At 8,751 feet above sea level, Guadalupe Peak stands as the highest point in Texas, ranking #14 among U.S. state high points under 10,000 feet. It’s located inside Guadalupe Mountains National Park and marked my 27th state high point.
The day I hiked Guadalupe Peak was filled with emotion. I had read plenty of reviews on AllTrails — my go-to hiking resource — and a few of them planted some doubt. One comment stuck with me: “The last 100 yards are a bit scary as you can see a long way down and the rocks are slick.” Combine that with an 8.4-mile out-and-back trail and nearly 3,000 feet of elevation gain, and yes — I was nervous. I even had flashbacks to my climb up Mt. Katahdin on Abol Trail.
In the end? Was it hard? Heck yeah. Was it as hard as Katahdin? Not even close. Was I glad I did it? One word: Ecstatic.
The night before I visited Palo Duro Canyon State Park, I stayed in Amarillo, just a short 25-minute drive to the park entrance. When I arrived in Amarillo, the skies were blue, but that morning I woke to dense fog. With the hope of the fog burning off, I ventured out early, only to be greeted by a Texan wake-up call: a lingering essence of cow manure, an aromatic reminder of cattle country.
From Amarillo, I drove south on Interstate 27, then east on Texas 217, a two-lane road. One of the things I appreciate about driving in Texas is the speed limit – 75 mph on both roads! About a mile from the park entrance, you get a glimpse of what you are about to see, and at the time I was thinking how awesome it was going to be.
The Hype is Real!
Palo Duro Canyon State Park lives up to the Texas hype. Known as the “Grand Canyon of Texas,” Palo Duro Canyon, at 120 miles long, and 20 miles wide, is the second largest canyon in the country. The park spans over 28,000 acres and includes 60 miles of the canyon that reaches depths of 800 feet. Home to the iconic Lighthouse rock formation, the park offers 30 miles of hiking, biking, and equestrian trails, many of which traverse million-year-old rock formations. The park’s scenic drive covers 16 miles, providing panoramic views of the canyon’s majestic red cliffs and vibrant colors. Palo Duro Canyon offers a variety of camping options, from primitive sites to RV hook-ups, allowing visitors to immerse themselves in the tranquility of the surroundings. As the site of the renowned Texas Outdoor Musical at the Pioneer Amphitheatre, the park combines natural beauty with cultural entertainment. Access to the park costs $8 per person for a day pass, with complimentary admission for children aged 12 and under. Holders of the Texas State Park Pass also enjoy free entry.
The Civilian Conservation Corps (CCC) played a vital role in the development of Palo Duro Canyon State Park, Texas, during the 1930s. CCC workers constructed trails, bridges, and buildings, enhancing accessibility and preserving the park’s natural beauty. Traveling from one state park to another, many a testament to the CCC’s dedication and the hard work of its young men, I am struck by the invaluable contribution to conservation. The enduring legacy of the CCC is evident in the transformative impact on parks, promoting environmental stewardship and recreation. These parks stand as vital green spaces, nurturing physical and mental well-being for generations to come.
Picture: The Park Entrance – notice the overcast/foggy morning
Top 5 Activities at Palo Duro Canyon State Park
Hiking:
Palo Duro Canyon boasts numerous hiking trails, ranging from easy walks to challenging hikes. The Lighthouse Trail is particularly famous for its iconic rock formation, but there are many other trails with varying lengths and difficulty levels to explore. And as you hike, the park has several geocaching sites to discover and part of the Texas State Parks Geocache Challenge.
Scenic Drives:
The park features a scenic drive that offers breathtaking views of the canyon. The Palo Duro Canyon State Park Scenic Drive is a 16-mile route that allows visitors to appreciate the stunning landscapes and geological formations from the comfort of their vehicles.
Mountain Biking:
Mountain biking enthusiasts can enjoy the park’s designated biking trails. The terrain provides a mix of challenges suitable for different skill levels. Make sure to check for trail conditions and any specific regulations before heading out with your bike.
Camping:
Palo Duro Canyon State Park offers various camping options, including tent camping and RV camping. The park has both developed and primitive campsites, allowing visitors to immerse themselves in the natural surroundings. Reservations are recommended, especially during peak seasons.
Cultural Performances:
The Texas Outdoor Musical, hosted at the park’s Pioneer Amphitheatre, is a popular event that provides entertainment and a glimpse into the area’s history. The musical, known as “TEXAS,” celebrates the pioneer spirit and features live performances against the stunning backdrop of the canyon.
Longhorns, again?!
As you enter the park, you are greeted by several members of the official State Longhorn Herd. They represent the history of longhorns in the area, which roamed here for 200 years and were part of the Old JA Ranch, which was headquartered in the canyon and one of the greatest cattle operations in the world. I am happy to report, that unlike my longhorn encounter on Mount Rogers in Virginia, these longhorns were in a corral and a bit further away.
Pictures: Longhorns | About the Old JA Ranch
I headed over to the Canyon Gallery & Visitor Center, just a short drive into the park—something I always suggest checking out when exploring a new park. The road leading to the visitor center is one-way with an upper parking lot by the observation point and a smaller lot down the hill. Inside, the Gallery showcases historical videos, archaeological and nature exhibits, and features a beautifully arranged display of Southwest art for sale, including handmade Native American pottery, Navajo, Zuni, and Santo Domingo silver and turquoise jewelry, hunting knives, and a unique selection of hard-to-find regional tools like Comanche and Kiowa beaded items, along with t-shirts and hats. The gentleman at the gallery, who shared some info about the park, was really pushing to sell items. I ended up getting a few postcards, though not exactly what he was suggesting. I did discover that the park is an in-and-out park, meaning the road is a loop and there is only one way in and one way out.
Pictures: The Visitor Center & Canyon Gallery (left picture courtesy of Palo Duro Canyon Foundation)
As I continued to tour the park, I saw a lone fireplace, the remains of a recreation center built by the CCC. The CCC constructed their own barracks, a mess hall, a blacksmith shop, a tool shed, and a recreation center before they began work on the park. They spent their downtime at the recreation center, playing games and socializing. I will have to say, if it were not for the internet, I would not have known this as the informational sign for this point of interest was in disrepair.
Pictures: CCC Recreation Center Fireplace | Informational sign in disrepair | Notice the skies clearing
From here, the road winds down to the canyon floor. At the base on the hill you’ll find the Mack Dick Group Pavilion and the Pioneer Amphitheater. The Mack Dick Group Pavilion is a great place for events as it can hold 169 people and has a full-size commercial kitchen. From this parking lot, you can take the Upper Comanche Trail a difficult 3.3 mile one-way trail that takes you half way up the side of the canyon wall. The Pioneer Amphitheater is home to the Texas Outdoor Musical and Shakespeare in the Canyon which run during the summer months (June through August).
Pictures: The Upper Comanche Trail from the Mack Dick Group Pavilion – you can see the road down to the canyon floor in the distance
Let’s Hike!
At the heart of Palo Duro Canyon State Park lies the iconic Lighthouse Rock, a must-visit destination prominently featured in the park’s marketing materials. To beat the midday heat and avoid the crowds, I opted to tackle this trail as my first adventure. It’s a moderate 5.6 miles roundtrip trail, that took me 2 hours 18 minutes to complete and this included a long stop at Lighthouse Rock. Apart from the trail’s length, I found it to be quite easy, except for the final half-mile, which encompasses the majority of the 512 feet elevation change.
As you approach any of the trailheads, you can’t miss the heat warnings and thermometers. Despite it being November, the temperature stood at a comfortable 65 degrees when I began my hike. Being an experienced hiker, I often pass along these safety tips to beginners:
Know your physical limitations and don’t push yourself.
Hiking is not a race, so pace yourself.
Hike with someone and/or make sure you tell someone where you are, when you start, and that you are back safe.
Watch your feet, especially in Texas. Not only should you be aware of rocks, but snakes. I use poles when in areas prone to snakes. Most snakes, like rattlesnakes, will typically move when they feel the ground vibrating from your poles or steps, but copperheads don’t typically move. Juvenile rattlesnakes can be the worst as they have finer fangs to penetrate sneakers and they haven’t learned to control their venom, so they will give you a full dose of venom.
Bring water and snacks for energy. The Texas sun and heat can be brutal, so stay hydrated and remember your body needs fuel.
Check the weather and be prepared. In many areas, storms will come in without advanced notice.
Pictures: Lighthouse Trailhead | Lighthouse Trail
Pictures: Thermometer and warning signs at the trailhead
The morning was absolutely stunning for a hike, and kudos to the park service for an excellent job marking the trails—many markers even include the distance from the trailhead. Early into my trek, the lingering fog dissipated, revealing a picturesque scene. In the snapshots of Lighthouse Rock, you’ll notice clear blue skies adorned with a few wispy clouds high above. As you traverse the canyon floor, be prepared to marvel at the stunning canyon walls, vibrant cacti, and diverse fauna, as well as encounter some animal droppings.
Amidst the beauty, the echoing calls of what seemed like geese high in the sky caught my attention. It fascinated me how the canyon walls magnified their sounds, making the birds surprisingly loud. Continuing my hike, I encountered several dry river beds and I could only imagine how full and dangerous these are when it rains. I did see some signs of the recent rains, but nothing that you couldn’t navigate.
Pictures: Some of the different trail markers and trail guides
Pictures: Cacti | Animal droppings
Picture: Canyon Walls along the beginning of the trail. Also, that’s not Lighthouse Rock – I thought it was at first.Picture: The Beauty of the Canyon Walls
Pictures: Bench and Tree | Another Heat Warning along the Trail – this is a serious situation here!
Picture: More of the Canyon
Pictures: Dry River Bed | The little water I saw on the trail
A New Career: Lighthouse Rock Docent
As you get closer to Lighthouse Rock and as you begin to ascend up the trail, the trail gets much narrower. It wasn’t crowded on the day of my visit, but I can only imagine how challenging this portion of the trail is when there are a lot of people on it. There are a couple of places to rest on your way up to Lighthouse Rock where you get a view of the canyon floor below you.
When you reach Lighthouse Rock, you’ll be directly in front of the rock and as it was around 11 AM when I got there, it was a backlit and not ideal for pictures. So, went around to the left of the rock and then came back and went around to the right of the rock. I’d recommend doing this as it gives you a much better perspective of the rock formation. As you walk around each side of the rock, be prepared as there are no marked trails.
I decided to have a little snack after getting some great pictures of lighthouse rock and before heading back to the parking lot. As more and more people came to the rock, I began to act as a docent, giving them tips on where to go and get pictures of this impressive rock formation. I think I found a new career calling!
Picture: View of the canyon floor belowPicture: Initial view of Lighthouse Rock, with the sun behind the top, causing the photo to be backlitPicture: View of Lighthouse Rock from the left sidePicture: View of Lighthouse Rock from the right sidePicture: Lighthouse Rock
Refueled and recharged after a quick snack, I zipped back to the parking lot with a brisk pace, eager to uncover more adventures. I passed several hikers on the way to Lighthouse Rock, including one couple that had just started their trek, and were already breathing heavily and panting. Needless to say, it became evident why so many cautionary signs. All I kept thinking was of my time on Mt. Kilimanjaro and the guides saying “pole, pole,” in Swahili or “slowly, slowly” – remember this is not a race. Lighthouse Trail was a great way to kick off my visit to Palo Duro Canyon State Park!
Pictures: The Canyon as I hiked back to the Lighthouse Trailhead and Parking Lot
Picture: Palo Duro Canyon from the canyon floor
Rock Garden
As you exit the Lighthouse Trail parking lot, Park Road splits and becomes a large loop. You can go in either direction and I decided to go left and head to Rock Garden Trail. This 2.4-mile one-way trail takes you through an ancient landslide up to the canyon rim, with an elevation change of 600 feet and it is rated difficult. There are several areas to pull off and park here, but no formal parking lot. This trailhead had a thermometer as well and the day was getting warmer – it was now 81 degrees. Time to hydrate!
I decided not to hike this entire trail as I knew I had a major hike and climb in 2 days and I wanted to save my legs and strength for that hike. As I looked up the side of the canyon, there seemed to be some cool and interesting rocks and boulders, so I decided to climb up a portion of the trail. I ended up hiking about 1/2 mile, which gave me some incredible views of the valley below as well as seeing some cool rocks and boulders.
After Rock Garden Trail, the road begins to loop back around towards the entrance. There are several places to park and at one I came across an interesting historical sign about the Battle of Palo Duro Canyon, one of the most significant battles of the 1874-75 Indian Campaign.
Pictures: Rock Garden Trailhead | Trail Thermometer – the temperature is now 81 degrees!
Pictures: Rock Garden Trail
Picture: The canyon below from Rock Garden Trail
Pictures: From Rock Garden Trail | Rock Garden Selfie
Picture: Historical Marker for the Battle of Palo Duro Canyon
The Big Cave
After coming around the bend and heading back towards the entrance, you’ll come to the Big Cave. Although this is on the park map and one of the Points of Interest, it is not well marked, nor is the trail to the cave. There is a picnic table by the side of the road, which is the best indicator that you are in the right place, and you park along the side of the road. It’s a relatively short hike up to the cave and due to the red clay soil, it can be a bit of a challenge – slippery – as you hike up into the cave. At first, I went up the left side of the cave but realized this was not really a viable path to the cave entrance. I end up hiking straight up into the cave. There is a little bit of a boulder scramble, and it looks much worse than it really is. Once in the cave, I was so happy I persevered and would recommend this as a stop.
Picture: Looking up to the Big Cave
Pictures: Going up the left side of the cave | Looking down from the left side of the cave
Pictures: Looking into the Big Cave | Initial view out of the Big Cave
Picture: Inside of the Big CavePicture: Looking out from the Big CavePicture: The side of the Big Cave entrance
After the Big Cave, I continued along Park Road on the floor of the canyon stopping at the Lone Star Interpretive Theater, the Old West Stables, and the Trading Post for more views of the canyon before I headed back up to the Visitor Center and for the last hike of my day.
Pictures: View of Palo Duro Canyon | One of the many informational signs
Picture: Final view of the canyon from the canyon floor before I headed back to the Visitor Center
CCC Trail
Embarking from the Visitor Center, the CCC Trail stretches 1.4 miles one-way, with a descent of 500 feet, earning its difficult rating. The journey takes you across four historical CCC bridges and through four distinct geologic layers, from the canyon rim to the floor below. Despite its challenging label, I didn’t find the trail overly strenuous. Having already explored the canyon floor, I decided to forego the final descent but covered a mile of the 1.4-mile trail. With a massive hike looming in two days, I wanted to conserve energy and focus on preserving my legs.
Completing the 2-mile out-and-back hike in a brisk hour, I highly recommend this trail if time allows. It treats you to some of the most breathtaking views of the canyon, offering unique perspectives of Park Road winding its way down to the canyon floor. Don’t forget to explore the various viewpoints along the trail; they might not be directly on the path, but they offer unparalleled glimpses of the canyon’s beauty.
Pictures: The view at the top of the CCC Trail
Picture: Looking back at the beginning of the CCC Trail and one of the geological layers
Pictures: The first of four CCC Bridges that you’ll cross
Picture: View Point just off the trail
Pictures: View of the Canyon as you hike down
Picture: Another CCC BridgePicture: Amazing view of Palo Duro Canyon
Pictures: Park Road winding down to the Canyon floor
Pictures: Trail Marker | Cool tree on the edge of the canyon
Picture: Where I turned around on the CCC Trail, just before the final descent to the canyon floor
So, gear up for an unforgettable adventure at Palo Duro Canyon State Park! Dive into a multi-day expedition, setting up camp right in the heart of this natural wonderland. Imagine waking up to the breathtaking beauty each morning, ready to conquer a different trail each day. Trust me, it’s not just a trip; it’s a journey that promises to etch a lifetime of vivid memories into your soul. Don’t miss out—seize the opportunity for an immersive experience that will linger in your heart forever!
As I headed westward from Louisiana to San Diego, I stopped at Lake Murray State Park in Ardmore, Oklahoma. I went via Dallas, Texas, and didn’t even recognize the city I used to live in. From the explosive growth came a concrete jungle with highway interchanges as tall as skyscrapers and strip malls covering every inch of land from Dallas to to Denton – some 40 miles. Lake Murray State Park is located about 1/2 way between Dallas, Texas, and Oklahoma City, Oklahoma, just off Interstate 35 and about 10 minutes from the center of Ardmore, Oklahoma.
Picture: Northern Park Entrance at US-70 and Route 77S
About the Park
Named after Oklahoma Gov. William “Alfalfa Bill” Murray, Lake Murray State Park comprises a 12,496-acre recreational area and a 5,728-acre, man-made lake created by the damming of the Fourche Maline and Anadarche creeks. Lake Murray’s crystal-clear spring-fed waters and 150 miles of shoreline welcome a variety of outdoor recreation opportunities including hiking, biking, boating, fishing, and camping. There is a $10 fee per day to park anywhere in the park that you pay through an app or you can pay cash at the park office. You’ll see signs at every parking lot, but only need to pay once per day.
Lake Murray State Park is the first and largest state park in Oklahoma and was constructed during the era of Pres. Franklin Roosevelt’s New Deal and part of several New Deal Agencies including the Civilian Conservation Corp or CCC, which I have written about in my past blogs about other state parks; and the Works Progress Administration or WPA. The solons envisioned the park as a relatively cheap recreational environment for the citizens of Oklahoma (I beg to differ with a $10 parking fee). Two main group camps were created, along with a “Negro” camp. Lake Murray State Park became the only state park built by the National Park Service to provide permanent camping facilities for black youth.
Staying at the park is easy with your choice between RV and tent campgrounds, 56 cabins dotted throughout beautiful Lake Murray State Park, and The Lake Murray Lodge with 32 rooms. The Lodge has a restaurant, an outdoor pool, a splash pad area, and a miniature golf course.
Pictures: Northern Park Map | Southern Park Map
Top 5 Activities at Lake Murray State Park
Lake Murray State Park is definitely a destination for boating and water activities, as well as camping. My impression was that it’s more of a “resort” and not the woodsy, outdoors, and rustic parks that I personally prefer to visit. This particular list of activities is ranked in what I feel are the common uses for the park.
Boating and Water Activities: Lake Murray is a large reservoir, and visitors can enjoy boating, fishing, swimming, and other water activities. The park has boat ramps, a marina, and designated swimming areas.
Camping: For those looking to extend their stay, Lake Murray State Park offers camping facilities. Whether you prefer tent camping or RV camping, there are options available within the park.
Golfing: Lake Murray State Park features an 18-hole golf course known as the Lake Murray State Park Golf Course. Golf enthusiasts can enjoy a round of golf surrounded by the park’s picturesque scenery.
Visit the Tucker Tower Nature Center: Tucker Tower is a historic structure located within the park that now serves as a nature center. It was originally designed to be a summer home for the governors of Oklahoma and today it is the home of the Nature Center and providing educational exhibits about the area’s natural history and offering panoramic views of Lake Murray.
Hiking and Nature Trails: Explore the natural beauty of the park by taking advantage of its hiking and nature trails, which span over 30 miles in total. These trails offer a chance to see local wildlife and enjoy scenic views of the lake and surrounding landscapes.
Let the Driving Tour Begin!
I spoke with the receptionist at my hotel in Ardmore and she gave me some good recommendations on the sights to see which included the Fishing Pier and Tucker Tower, but added that Tucker Tower was currently closed for repairs. After breakfast, I headed out to the park, entering from the north entrance by the Lake Country Store, then taking Route 77S, the scenic highway around the park and lake. I did find it odd that the speed limit on 77S is 45 mph, which I thought was fast and not conducive to enjoying your drive around the park.
Before I continue, I wanted to give you some background and context on my visit. I felt as if Lake Murray State Park is best explored if you are staying there for a couple of days, which I did not do. I also think having access to a boat is key to fully enjoying the park, which I did not have. I personally love hiking, and to be frank, outside of my jaunt to Buzzards Roost, I didn’t find the trails very interesting. I also think that because my visit was in November, there wasn’t a lot open at the park and it lacked energy from having people around. So hopefully that will help if you are looking to visit the park.
With that said, I first stopped at the Pecan Grove Picnic Area, and yes, you have to pay to park here. It is a typical picnic area and there is a trail that you can take back north to the Lake Country Store and along the lake.
Pictures: Pecan Grove Picnic Area
Pictures: The trail at Pecan Grove Picnic area
Next up was the North Boat Ramp, where you get your first view of the lake. I had to laugh as I pulled into the parking area and saw a parking enforcement officer in his car, which I certainly didn’t expect to see, especially on a quiet Monday. So I guess they take their parking fee seriously.
As I continued south, Dukes Forest Campground was next, but it was closed for the season. Shortly after this, there is a small parking area and the Johnson Memorial Bridge, an arched bridge named in honor of E.J. Johnson, project superintendent for the CCC work projects here at Lake Murray.
Pictures: Memorial Bridge | Large Boulder by the Bridge | Plaque about the Bridge
Next, I took Gatehouse Road towards the lake, which will take you to several camping areas and sights – Elephant Rock Camp, Cedar Point Camp, and Tipp’s Point Boar Launch. Gatehouse Road also dead ends into a parking lot with a view of the lake. As I drove through this area, I saw the only wildlife on my tour, some deer.
Pictures: Lake Murray from Elephant Rock Campground
The Lake Murray Lodge
Lodge Road, the western park entrance, is next on the tour. At the intersection of Route 77S and Lodge Road is one of the Park Offices, which to my surprise was closed. As you drive towards the lake, you’ll first pass some of the park’s cabins and then you’ll arrive at The Lake Murray Lodge – home to an outdoor pool, miniature golf, and a water sports rental center. There are also floating cabins nearby. As you leave the area, you’ll pass the Historic Water Tower, vital to the park’s cabins and lodge during their initial years of operation.
Pictures: One of the Cabins | The Lodge’s Outdoor Pool
Pictures: Miniature Golf Course | Water Sports Rental Center
Pictures: Lake Murray Lodge
Pictures: The Historic Water Tower
Some of the Water Activities
The Fishing Pier, recommended by the hotel receptionist, is right after the Lodge Area. For the record and as I know it, a pier is built out into the water, while a bridge crosses the water from shore to shore. Sorry State of Oklahoma, this is a bridge and not a pier. I walked across the “pier” as I wanted to hike some of the trails in the park, only to find a yellow stake in the ground, a trail guide of sorts, that was hardly legible and written with a Sharpie. Really?!
I ended up hiking about 1/4 mile and as I was unsure where the trail went, I turned back and went up another trail along the water’s edge. From here I got a nice view of the “pier” and the cove. This trail wasn’t well marked, so I turned around and headed back to my car. On my way, I ran into a woman with a strong accent, either Eastern European or German, walking her dogs. She stopped me to see if I knew about the trails and where this trail went. I told her that the Park Office was closed and I wasn’t able to get a trail map. With that she pulled out the maps she got from the Park Office – they were detailed topographic maps, that were so small you needed a magnifying glass to read, and so detailed you needed a PhD in Rocket Science to decipher them. I think the State needs to hire me as a Park Consultant.
Pictures: Sign at the Parking Lot | The Fishing “Pier”
Pictures: Trail Guide? | View of the Cove and Lake
Picture: The Fishing “Pier”
The Marina
Lake Murray Marina currently features 352 boat slips which should not be a surprise as boating is probably the number one feature of the park. The marina is accessible from Boat Dock Road and a portion of it is accessible from Buzzards Roost. For those wanting to just enjoy the water, there is the Lake Murray Marina Beach. From the marina, you also get a direct view of Tucker Tower Nature Center. This happened to be my only view of the infamous Tower as the road to the tower was closed on the day of my visit.
Pictures: The Marina
Pictures: My only view of Tucker Tower | The Entrance to Tucker Tower Nature Center
Picture: Tucker Tower Nature Center with the Marina in the background
The Best for Last
Buzzards Roost Road ends on the south side of the Marina. Along this road, you’ll see one of the original CCC Picnic Pavillions, constructed of large timbers and native stones. Next to the Buzzards Roost Campground, there is a small parking lot and the remnants of a cabin or building. To the right of the building is a set of stone stairs that will take you up to the Roost. Once on top, you can hike to either the left or right. I went in both directions and eventually found openings in the rocks where I had the most incredible and magnificent views of the lake and surrounding area. You can tell hiking, especially up and through rocks, is my jam!
Pictures: CCC Picnic Pavillion
Pictures: Building Remnants
Pictures: Some of the Stairs to the Roost
Pictures: Trail along the Roost | Selfie on the Roost
Picture: View from the Roost
Pictures: Views from the Roost
I finished my tour with a stop to get a view of the lake from a higher elevation, then a stop at Rock Tower. Overall it was a nice and interesting park that I would probably visit if I lived in the area, but I certainly wouldn’t list it as a destination park or a park I would make a special trip to.
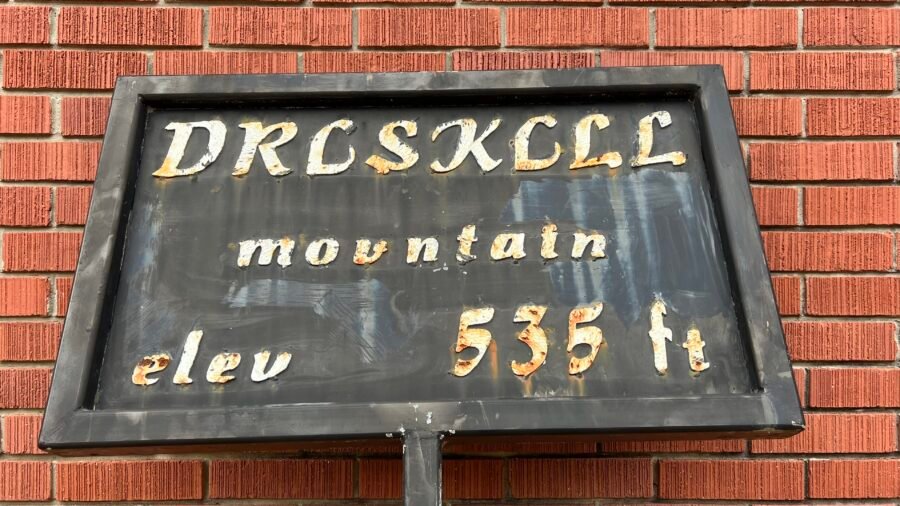
After summiting Mount Magazine | Arkansas (#25) the day before, I continued my journey south into Louisiana and on to Driskill Mountain.
Driskill Mountain holds the distinction of being Louisiana’s highest natural summit, standing at 535 feet above sea level. It ranks #48 in State High Points — and it was my 26th High Point.
Located in northern Louisiana within the Kisatchie National Forest, it’s about 60 miles east of Shreveport and just 18 miles south of Interstate 20.
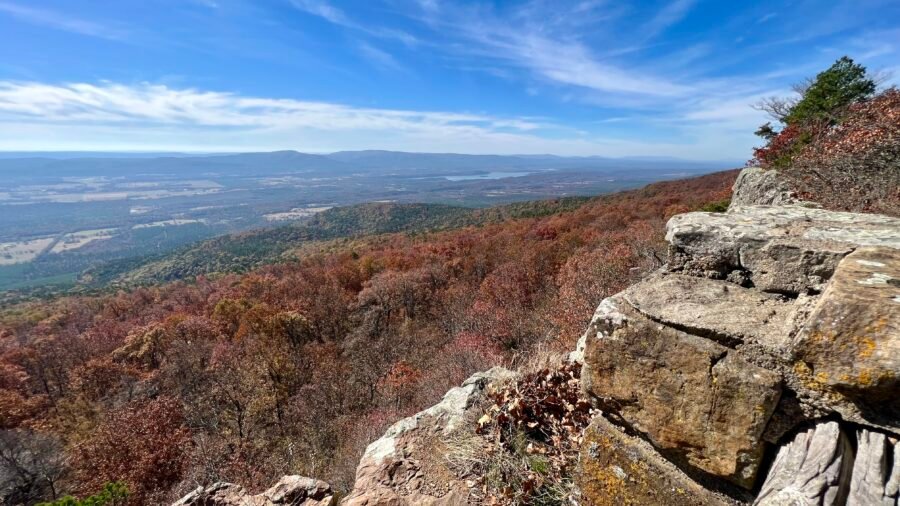
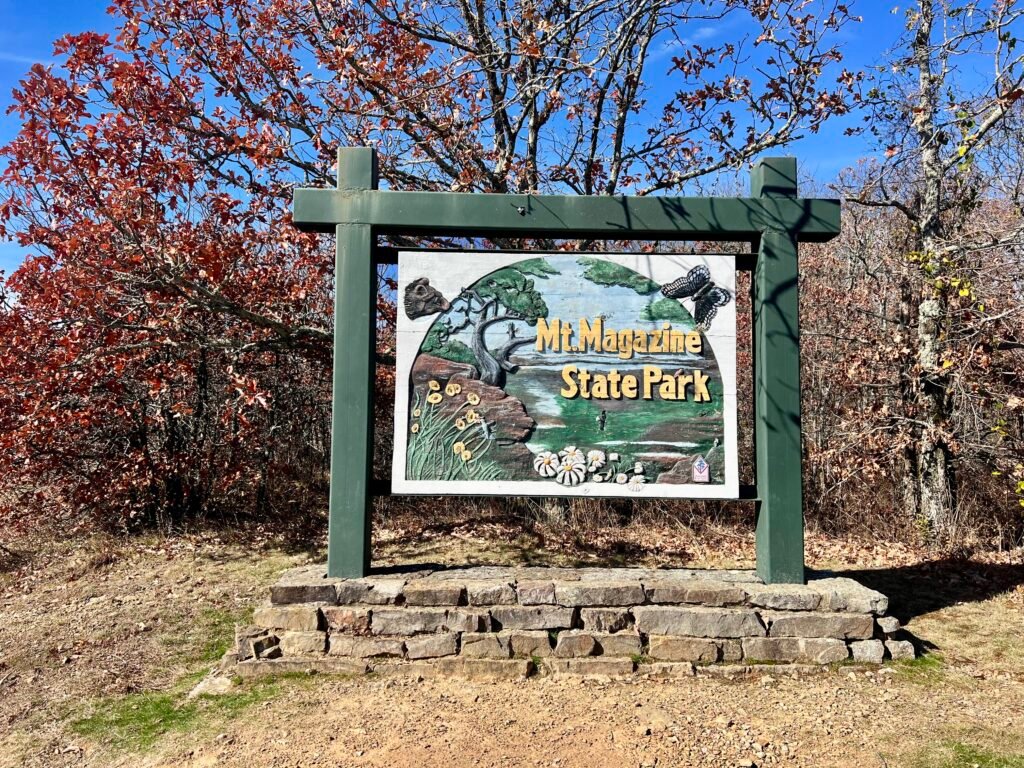
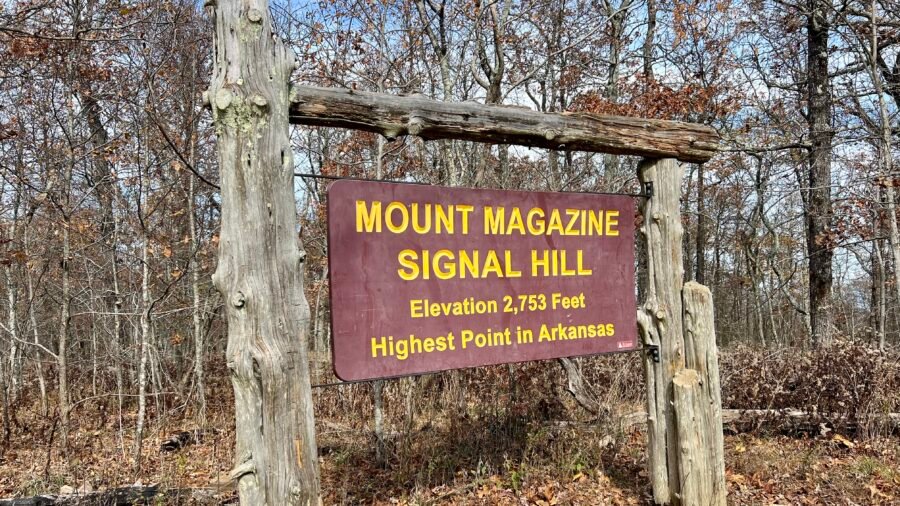
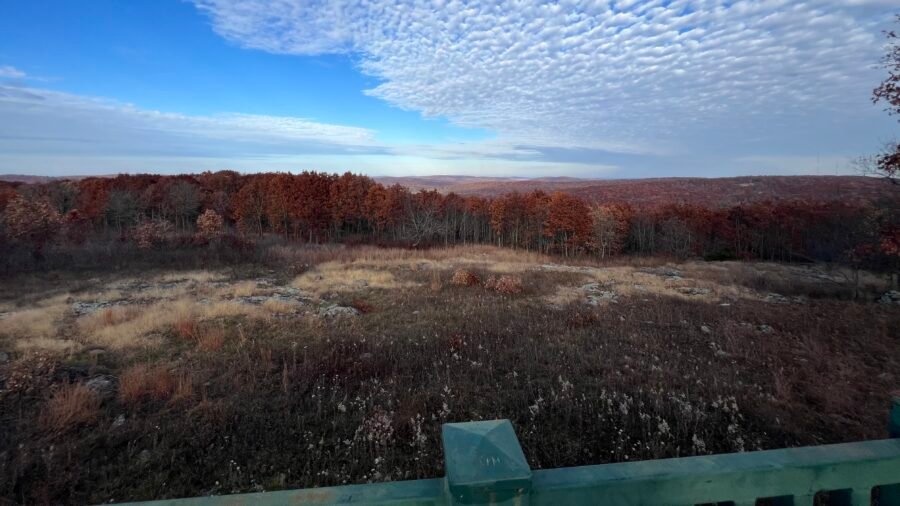
Since Mount Magazine and Signal Hill (the highest natural point in Arkansas) are both located within Mount Magazine State Park — which is on my list as the Best State Park in Arkansas — I decided to cover them together in one blog post.
Since Mount Magazine / Signal Hill sits inside Mount Magazine State Park — which is on my list as the Best State Park in Arkansas — I decided to combine both into one post.
The park is about 2 hours west/northwest of Little Rock, roughly 1 hour 15 minutes east of Fort Smith, and a little over 2 hours south of Bentonville — home of Walmart, for you trivia buffs.
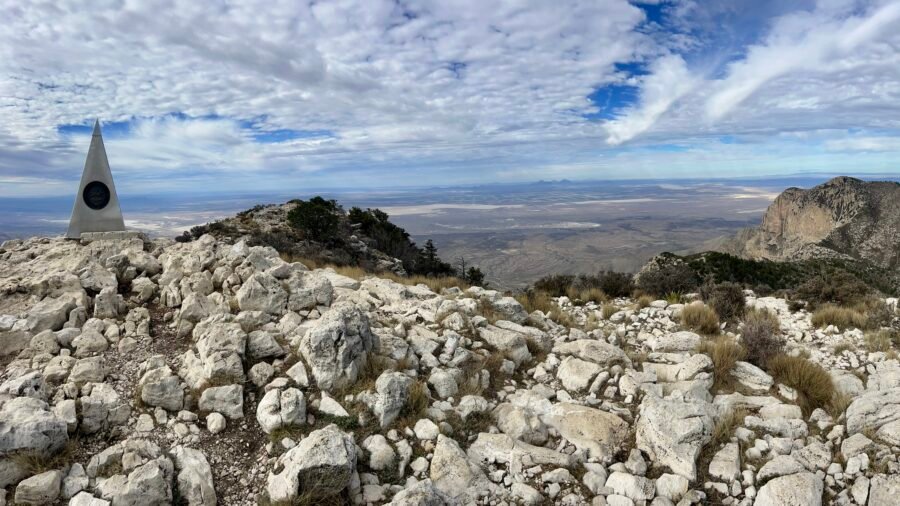
Taum Sauk Mountain, located in the St. Francois Mountains of the Missouri Ozarks, is the highest natural point in the state. It stands at 1,772 feet, ranks #41 in State High Points, and was my 24th State High Point.
I sent a photo of me at the “summit” to my friend Pam, who’s originally from Joplin, Missouri. Her reply? “Fantastic!” Followed quickly by: “Had no idea MO had a high point! 🤣”
Honestly… fair.
It’s not exactly a dramatic summit. However, it is a beautiful state park, it’s outdoors, and it carries a surprisingly rich history.
Cape Henlopen State Park is a fascinating park, that offers so many different experiences and is worthy of visiting on multiple days. In fact, I would suggest using Lewes, Delaware or another nearby city as a vacation hub – Cape May, New Jersey (blog post coming soon) is a short ferry ride across the bay and Assateague State Park and Assateague Island National Seashore are about an hour away. There is so much to do in the area.
Picture: Park Entrance
A Guys Day
I specifically came to Lewes, Delaware to visit my friends Amanda and Phil. We all took the short trip to Assateague State Park and had a blast. However, on this day, Amanda had to work, so it was just Phil and I for a guy’s day out. That morning both Phil and I had a little work to finish before we headed out. I also made a little breakfast nosh, Smoked Salmon & Avocado Toast with Everything But the Bagel Seasoning. Delish! On the way to the park, we stopped by to see Amanda at the local Golf Club she bartends for a Bloody Mary. Let’s get this party started!
Picture: Smoked Salmon & Avocado Toast
About the Park
Cape Henlopen State Park, nestled on Delaware’s picturesque coast, offers a captivating blend of natural beauty and recreational opportunities. Spanning over 5,000 acres, this coastal gem boasts pristine beaches, rolling sand dunes, and lush maritime forests. Outdoor enthusiasts can explore a network of scenic trails, ideal for hiking and biking, while birdwatchers delight in the park’s diverse avian inhabitants.
History buffs can explore the iconic World War II observation towers that stand as silent sentinels along the shoreline. The park’s centerpiece, the historic Fort Miles, provides a fascinating glimpse into the region’s military past. Visitors can also indulge in water activities, from swimming in the Atlantic to fishing and kayaking in the park’s tidal salt marshes. With its rich ecological diversity and recreational charm, Cape Henlopen State Park beckons nature lovers and adventure seekers alike to discover the magic of Delaware’s coastal wonders.
Pictures: Park Maps were the focus of our visit, specifically the left-hand map.
Top 5 Activities
Explore the Beaches: Cape Henlopen State Park offers pristine beaches along the Atlantic Ocean. Visitors can relax on the sandy shores, swim in the refreshing waters, or engage in beachcombing and seashell collecting.
Hiking and Biking Trails: The park features an extensive network of scenic trails, including the popular Gordon’s Pond Trail and the Seaside Nature Trail. Hikers and bikers can immerse themselves in the park’s diverse landscapes, from coastal dunes to lush forests.
Visit Fort Miles: History enthusiasts can explore the historic Fort Miles, which played a crucial role in coastal defense during World War II. The fort features bunkers, observation towers, and informative exhibits, providing a fascinating glimpse into the area’s military history.
Birdwatching: Cape Henlopen is a haven for birdwatchers, offering diverse habitats for numerous bird species. Bring your binoculars and observe the variety of shorebirds, songbirds, and raptors that inhabit the park, especially during migratory seasons.
Water Activities: The park’s coastal location provides opportunities for various water activities. Fishing enthusiasts can try their luck from the fishing pier, and kayakers can explore the tidal salt marshes. The park’s natural beauty is best experienced from the water, adding an extra layer of adventure to your visit.
Reliving our Childhood
Both Phil and I grew up in an era of G.I. Joe and are both history buffs, so our first stop was Fort Miles. We had also visited Cape May, New Jersey the day before, where we initially learned about the observation towers and gun bunkers in the area. When visiting the park you have to go up into one of the Observation Towers. The observation towers have a rich history dating back to their construction during World War II when they served as lookout posts for coastal defense. These towers played a crucial role in monitoring the Delaware coast for potential enemy activity. Triangulation techniques were employed in their design, ensuring precise alignment and effective surveillance capabilities during their wartime function. Today, the observation towers are iconic landmarks, offering breathtaking panoramic views of the surrounding area.
Pictures: One of the Observation Towers | About the Observation Towers
Pictures: Spiral Staircase to the Top | Selfie on the Top of the Tower
Pictures: Views from the Observation Slots
Picture: View from the Observation Slots with the main gun battery
Battery 519
From the parking lot, it is a short walk to Battery 519, a 15,000-square-foot fortified underground chamber. Today, the main battery houses the Fort Miles Museum. Along the initial part of the walk, you’ll pass some of the original barracks and several of the weapons that were used to protect the fort and the coast. And of course, our inner childhood came out. . .
Pictures: The Barracks area and some of the weapons used to protect the fort.
Pictures: Boys will be Boys
As you walk up to the main bunker and Museum, you’ll see a couple of the guns used to protect the coast during WW II. The largest gun on display actually came from the USS Missouri, Mighty MO. This massive gun could shoot a 2700-pound shell over 20 miles with pinpoint accuracy. And you can see the damage such a shell can make on the thick steel of a Japanese ship during the war.
Pictures: Mighty Mo’s Big Gun | A shell and the type of damage it did to a Japanese ship
Picture: One of the guns used to protect the coast
Pictures: Fort Miles Museum
Pictures: Views from the Museum terrace
Beach Time
From Fort Miles, we continued our loop around the park and headed for the Senator David B. McBride Beach Bathhouse. It is a gorgeous facility with a boardwalk to the beach. I can only imagine how busy this place must be in the summer – remember our visit was at the beginning of November.
Pictures: McBride Beach Bathhouse | Boardwalk to the Beach
Pictures: Pillar on the Beach | Only the Shadows Know
Picture: The serenity of the beach
Birds of Prey
Right next to the Bathhouse area, you can spot the Cape Henlopen Hawk Watch Tower. This spot used to be a military bunker, but now it’s a great place to watch different types of raptors fly by. It’s pretty neat that they keep count of all the birds they’ve seen yesterday and overall. So if you’re interested in birdwatching, this is the perfect spot!
Pictures: The Bunker beneath the Hawk Watch | The Hawk Watch Tower
Pictures: Daily and To Date Raptor Sightings | View from the Hawk Watch Tower
The Point
Next up, my favorite part of the park – The Point. The beach was so chill and beautiful! We didn’t have enough time to check the whole thing out, though. Next time, I’d love to take a longer hike out to the point. We noticed a ton of horseshoe crab shells scattered around the beach. Later, we learned that the Delaware Bay and the area off of Cape Henlopen has the world’s largest spawning population of horseshoe crabs, which are the official State Marine Animal. They look like they’re straight out of the movie Predator, pretty cool! We also got to see a couple of other native crabs that were still alive.
Picture: The walk down to the beach from The Point parking lot
Pictures: A couple of the Horseshoe Crab shells
Pictures: Some of the other crabs we saw, per Google Lens – Lady Crab (r) and Ghost Crab (l)
Picture: Looking out to the Point
Last Stop – The Fishing Pier
The fishing pier at Cape Henlopen State Park offers a stunning view of the Delaware Bay, with sights of the Ferry port, The Point, a lighthouse, and Cape May, New Jersey. I met several fishermen on the pier who had caught Tautog or Blackfish that day, a fish species that is popular in chowders and similar to Red Snapper. I highly recommend a visit to Cape Henlopen State Park for a great day out!
Historic Downtown Lewes
After a long day, we hit up historic downtown Lewes for a refreshing libation and snack at the Pink Pony, the bar at Bramble & Brine at The Butttery. It’s a super cute bar with hundreds of equestrienne ribbons, and definitely worth checking out when you’re in Lewes.
Pictures: Historic Lewes, Delaware
Pictures: Bramble & Brine at The Buttery | The Pink Pony Bar and Equestrienne Ribbons
Pictures: Crab au Gratin | Older Old Fashion | Yumsies Humsies
I was in the Albany, New York area visiting family, and my sister, Vicki, and I decided to do a hike before we both headed back our separate ways. On a side note, I convinced Vicki to hike Mount Greylock, the highest point in Massachusetts and the first of my State High Points, during a trip to Massachusetts to see the incredible Sona Jobarteh in concert. The two of us have hiked many places together and this hike in John Boyd Thatcher State Park – commonly known as Thatcher State Park – was quite a fun and interesting find.
Brunch First, then Hiking
Our sister Melissa and her husband Richard also made the trip up to Albany as it was sort of a mini family reunion, actually a cousins reunion. After the reunion, and before we headed out, we went to The Scene Coffee and Cocktails in Albany, New York for brunch. It’s a super cute restaurant with a patio, complete with a Gelato Cart (although it was not open when we were there) and a Champagne Vending Machine. I thought the vending machine was super cool. You ordered and paid for everything at the counter, and if you ordered champagne, they gave you a special token for the vending machine. Unfortunately, no champagne today as we were heading out for a nice hike. The brunch sandwiches and coffee were delish and I would definitely recommend The Scene if you are in the area!
Pictures: The Scene – Albany | NY
Pictures: Gelato Cart | Champagne Vending Machine
Pictures: Uber Cute Coffee
Pictures: A couple of the delish Brunch Sandwiches
Off to Voorheesville
Thatcher Park is in Voorheesville, New York – that’s quite the name and no it’s not from a Dr. Seuss book. In the early 17th century, Dutch settlers established the colony of New Netherland, with Albany becoming a crucial trading post along the Hudson River. In 1899, Voorheesville was founded with its roots in the Albany and Susquehanna Railroad era, and it was named after Alonzo B. Voorhees, a railroad attorney. Over the years, it has evolved from a railway community to a charming village known for its historic buildings and community-oriented atmosphere.
About the Park
Thatcher State Park is a hidden gem for nature lovers and adventure seekers alike. Nestled in the scenic Helderberg Escarpment, this park offers a perfect blend of outdoor activities and breathtaking views. With over 2,000 acres of lush greenery, hiking enthusiasts can explore a network of trails that wind through wooded areas and lead to panoramic overlooks. The park has a $6 per vehicle fee, but my sister has an annual Empire Pass, so it’s included with the pass.
For those who prefer a more relaxed experience, the park provides spacious picnic areas, inviting families and friends to enjoy a sunny day outdoors. The park isn’t just about hiking and picnics; it boasts an awesome playground for kids and a refreshing pool to cool off during the summer months.
One of the highlights is the impressive Indian Ladder Trail, where you can walk along the cliff’s edge and take in the stunning vistas. If you’re lucky, you might even spot some soaring birds of prey. John Boyd Thatcher State Park isn’t just a park; it’s a nature-packed playground waiting to be explored. So, whether you’re up for a challenging hike, a leisurely picnic, or simply soaking in the scenic beauty, this park has something for everyone. Get ready to escape the hustle and bustle and immerse yourself in the tranquility of Thatcher State Park!
Pictures: Park Maps – for our hike, use the map on the left as a reference
What the heck is an Escarpment?
An escarpment is a steep, often cliff-like geological formation that marks the boundary between different elevations of terrain. Typically formed by erosion or tectonic activity, an escarpment creates a distinct and abrupt change in elevation. These formations are characterized by their steep slopes and can be found in various landscapes, offering stunning panoramic views from the elevated side while creating a notable transition between high and low areas.
Sounds like a cliff, so I asked ChatGPT what the difference was: While both cliffs and escarpments involve steep slopes, the key difference lies in their scale and geological context. A cliff is a vertical or near-vertical rock face with a considerable drop, often overlooking a body of water. In contrast, an escarpment is a more extensive and generally less steep slope that separates two different elevation levels in a landscape. Escarpments are larger geological formations, often marking the boundary between higher and lower terrains, whereas cliffs are more localized and frequently associated with coastlines. So there you have it!
Picture: About the Helderberg Escarpment
Top 5 Hiking Activities
Thatcher Park Overlook: One of the highlights of the park is the Thatcher Park Overlook, which provides breathtaking panoramic views of the Hudson Valley and the Adirondack Mountains. It’s a popular spot for visitors to take in the scenic beauty of the surrounding landscape.
Indian Ladder Trail: This trail takes hikers through a series of picturesque rock formations, caves, and waterfalls. The trail offers a unique perspective of the park’s geology and provides opportunities to explore the natural beauty of the area.
Hailes Cave: Hailes Cave is a fascinating limestone cave located within the park. While it may not be open to the public at all times, guided tours are sometimes available, allowing visitors to explore the cave’s unique features and learn about its geological significance.
Escarpment Trail: This challenging trail runs along the Helderberg Escarpment and offers stunning views of the Hudson Valley. Hikers can enjoy the diverse terrain, including rocky cliffs and wooded areas, as they traverse this scenic trail.
Thatcher Park Visitor Center: While not a hiking destination per se, the visitor center is a great starting point for exploring the park. It provides information about the park’s history, geology, and natural features. Additionally, it offers educational exhibits and interactive displays.
Our Visit:
We started at Thatcher Park Overlook, the first item on the list above, and it certainly delivers on the beautiful panoramic view. It is interesting, but understandable, that there is a parking time limit here. They are obviously trying to discourage hikers from parking here and wanting the spots to turnover for people coming here for the panoramic views.
Pictures: Panoramic Views from the Overlook
Picture: View from the Overlook, looking towards where we would park and start our hike
Parking time is up, time to find a parking spot
We decided to park near the Glen Doone Pavillion, the start/end of the Escarpment Trail. As a note, there is a restroom in this parking area. First, we headed to the point, which offers views of the valley below as well as the Overlook parking area. From here, you can see in the distance the other areas the trail will take you. The Escarpment Trail is 2.4 miles long (one-way) and is predominantly flat, so a relatively easy hike.
Pictures: Views from Glen Doone – Looking Back at the Overlook Parking Area | Valley Below
As you hike the Escarpment Trail towards the Visitor Center, you’ll hike through the Overlook Parking area again. Then as you round the bend at La Grange Bush, you’ll see another point and get a view of the Visitor Center.
Picture: View from La Grange Bush looking towards the Visitor Center.
Indian Ladder Trail
About halfway along the Escarpment Trail, just past La Grange Bush, you’ll come to the Indian Ladder Trail, 0.44 miles long. There is some elevation on this trail as you first descend a flight of stairs, then back up on the other side. However, I would HIGHLY recommend taking this trail. This trail will give you a close-up view of the cliffs as well as an opportunity to hike under the cliffs. But the best part of the trail – the two waterfalls that you pass under, first Minelot Falls, and then Outlet Creek Falls.
Pictures: Trail Under the Escarpment | Trail along the Escarpment
Pictures: Minelot Falls
Picture: Outlet Creek Falls
Pictures: Along the Indian Ladder Trail
As you ascend on the other side of the Indian Ladder Trail, you’ll come upon the Visitor Center and Thatcher Point. It’s a beautiful building with a spectacular view and a great place for events. The day we were there, they had just finished a wedding.
Picture: The Visitor CenterPicture: Vicki and Me along the Escarpment TrailPicture: View from Thatcher Point
The Squeeze Box
When we reached the end of the Escarpment Trail, we continued a little further and came across the Squeeze Box – the entrance to the Rock Climbing area. If you can’t fit through here, you won’t be able to fit through Helm’s Crevice, the access point to the Rock Climbing area. It’s tight as you can see!!!
Pictures: The Squeeze Box | Helm’s Crevice
Back to Glen Doone
At this point, we turned around and headed back to Glen Doone and our car. However, when we got to the Visitor Center and the Indian Ladder Trail, we continued along the ridge and on the Escarpment Trail. On this part of the trail, you cross the streams that become the waterfalls on the Indian Ladder Trail. It was a fun day of hiking and I would definitely recommend a visit to John Boyd Thatcher State Park! Bring a picnic and spend the day exploring the trails and enjoying the panoramic views.
I was well overdue on visiting Lewes, Delaware to see longtime friends Amanda and Phil, and when the opportunity came up, I immediately headed East. I mentioned that there were two parks I wanted to visit on the Discoverer’s List of the Best State Park in Each State. Amanda immediately jumped on the opportunity to visit Assateague State Park as it had been on her list of places to visit. With our cooler full and a beautiful day in the forecast, we headed south on the scenic Coast Highway to Maryland. The drive was just over an hour and as we drove through one town after another, I was amazed at the number of miniature golf courses along the way.
I’ve shared a bit about the park, ponies, and wildlife in the next sections. So feel free to skip through and jump to my notes about my visit and about Assateague National Seashore.
About the Park
Assateague State Park, Maryland’s only oceanfront park, is located on Maryland’s eastern shore and is known for its breathtaking coastal beauty and unique wildlife, particularly its famous wild ponies. These wild horses, known as Chincoteague Ponies, freely roam the park’s beaches, marshes, and woodlands, creating a distinctive and enchanting atmosphere for visitors. The ponies are believed to be descendants of shipwreck survivors and have adapted to the island’s dynamic ecosystem. Visitors can observe these majestic creatures in their natural habitat, providing a rare and memorable wildlife encounter. Assateague State Park spans 855 acres and offers a range of recreational activities, including camping, hiking trails, bird watching, and pristine sandy beaches for swimming and relaxation. The combination of natural beauty and the presence of these iconic wild ponies makes Assateague State Park a must-visit destination for nature enthusiasts and those seeking a unique connection with the untamed charm of coastal wilderness. Fees: Memorial Day weekend through Labor Day $5/person | After Labor Day to Memorial Day weekend $5/vehicle.
Picture: Entrance on Assateague Island
About the Ponies
There are two herds; one in Maryland and one in Virginia. There are approximately 78 in the Maryland herd and about 150 in the Virginia herd. A contraceptive darting program may be used with the Maryland horses to keep the population size to a sustainable number.
Local lore experts theorized the ponies arrived on the island via a shipwrecked vessel in the late 18th or early 19th century. Others attribute their arrival by pirates drawn to the island who ultimately abandoned the animals. A more likely theory is that farmers in colonial times used the island for grazing areas to avoid paying taxes on the land.
The National Park Service manages the herd of ponies at the northern end of Assateague Island. The separate herd in Virginia is owned by the Chincoteague Volunteer Fire Department, which sponsors the annual pony penning and swim every July.
The ponies’ diet consists mainly of marsh and dune grasses. Their water comes from the freshwater ponds located on the island. They are true horses, and not actual ponies, who have adapted to the diet and life on Assateague. During the winter their coats become quite thick to protect them from the harsh winds. Their short, stocky build allows them to navigate the marshes and to store water efficiently.
Other Wildlife
Assateague Island, situated on the Atlantic flyway, is a bird-watcher’s paradise. Over 200 species of birds have been sighted here, ranging from gulls to herons, egrets to eagles, and even rare peregrine falcons and snowy owls. The most commonly seen birds include ospreys, herons, egrets, sandpipers, shorebirds, ducks, geese, and other waterfowl. There are also two types of deer on the island, whitetail and sika.
The ocean and bay that surround the island are full of life. Dolphins can often be seen playing in the waves of the ocean. Flounder, spot, sea trout, puffer, rockfish, croaker, red drum, and bluefish are residents of the area, while marlin and tuna can be found in the deeper waters offshore. Occasionally, seals, whales, sand sharks, and sea turtles wash up on the shore.
My Visit to the Park
Our first stop before we crossed over to Assateague Island, we stopped at the Assateague Island Visitor Center, which is operated by the National Park Service (NPS). The visitor center has a lot of information about the history of and wildlife on the island, as well as a book and souvenir store shop. Assateague State Park encompasses only a small portion of the island, while Assateague Island National Seashore encompasses the majority of the island. Since this is operated by the NPS, we didn’t get much information about the park but did ask where there were pony sightings. The area around the visitor center offers some spectacular views of the Sinepuxent Bay.
Picture: Assateague Island Visitor Center
Pictures: Outdoor Map at the Visitor Center – if you zoom in on the picture to the left, you can see how small the State Park is relative to the Island.
Picture: Sinepuxent Bay
Let’s find some Ponies!
We headed across the Verrazano Bridge and over Sinepuxent Bay to the State Park and as soon as we got to Stephen Decatur Memorial Road, we saw our first ponies. We then continued straight and into Assateague State Park where we parked, paid our $5, and to our surprise, there was a lone horse just standing in the parking lot! The State Park has a beautiful beach, the 5 Tides Restaurant and Shop (which was closed for the season), and numerous camping sites. We headed to the beach to see if we could get a glimpse of the ponies on the beach, but there were none, just a bunch of surfers. We also walked along the road through the campgrounds (which was empty) in search of more ponies, but only found evidence of them in the form of Horse “Muffins.”
Picture: The lone pony in the parking lot.Picture: Assateague State Park Beach
Pictures: Beach Access from the Campgrounds | Horse “Muffins”
Picture: Campground with Bathroom and Shower Facilities
Ponies Sighting!
We decided to head out and see if we would have better luck at the Assateague Island National Seashore, so we headed back to the car and then south on Stephen Decatur Memorial Road. And to our surprise, as we left the parking lot, we saw the horse that was in the parking lot, now grazing by the roadside. Then as we turned left onto Stephen Decatur Memorial Road, we saw another pony!
Pictures: The Ponies!
Assateague Island National Seashore
As we approached the entrance to the National Seashore, there was a line of cars paying the entrance fee. I was a bit shocked at the cost of $25 per vehicle for 7 days (Although I swear it was $35). Anyway, I knew I was about to embark on a trip across the country, so I decided to renew my America the Beautiful Pass ($80 for the year), which gave us access to the park. I should note that if you arrive by foot or bicycle, there is no fee. Hint: Perhaps bring your bike, park at the state parking lot for $5, and ride your bike into the National Seashore.
Picture: Entrance to Assateague Island National Seashore
We decided to hike two trails while we were there – the Life of the Marsh Trail and the Life of the Forest Trail. The Life of the Marsh Trail takes you on an elevated boardwalk winding above the wetlands and mudflats and also takes you out to Sinepuxent Bay.
Picture: Sinepuxent Bay from Assateague Island
Pictures: Me, Amanda, and Phil | The Wetlands
We ran into a bunch of people during our hike and asked them if they had spotted any ponies. Then we got lucky – someone told us that there were several ponies on the Life of the Forest Trail! So we set off on our mission to see more ponies. The trail was a beautiful one that took us through the woods and eventually led us to a boardwalk with a view of a marshy area. Even though we didn’t spot any ponies on the trail as we had hoped, we did manage to see a few off in the distance. Our goal was still to see the ponies on the beach, so we moved on to the Life of the Dunes Trail. This trail took us through the dunes and along the beach. I was pretty sure that with all the trees and “hiding” places, we would definitely spot some ponies here – but no luck! We were still happy to have seen a couple of the ponies and decided to head out. But before we drove too far, we spotted another pony! With our day complete, we headed back north to grab a bite to eat. I enjoyed our trip to Assateague State Park and the Assateague Island National Seashore and would highly recommend it. On my next visit, I would spend more time on the beach relaxing.
Pictures: From the Life of the Forest Trail
Picture: The Beach from the Life of the Dunes TrailPicture: Our Final Pony Sighting
We had lunch in Selbyville, Delaware, just across the Maryland/Delaware border at Catch 54. My meal was a bit of a dichotomy – we all shared Crab Dip Loaded Tots and then I had the Roasted Beets with Pistachios, Grapefruit, Goat Cheese Mousse, and a Ginger Vinaigrette along with a refreshing Thompson Island IPA. Next up on my list to visit – Cape Henlopen State Park in Lewes, Delaware, and I also made a trip to Cape May, New Jersey.