Rattlesnakes, Regulations, and Ridiculously Good Views
Catching up on some hikes from 2024, I found myself at Daley Ranch Park, a 3,201-acre conservation area in Escondido, California. I really didn’t know what to expect. I figured I’d get some miles in, gain a little elevation, and—hopefully—avoid the kind of crowded trails that tend to attract hikers lacking any semblance of trail etiquette. Normally, when I pull into a packed parking lot, my first instinct is to turn around and head somewhere quieter. But I stuck with my plan, and outside of a close encounter with a rattlesnake, Daley Ranch exceeded my expectations.
At 5,429 feet above sea level, Panorama Point is Nebraska’s highest natural point, tucked into the far southwestern corner of the state where Nebraska, Wyoming, and Colorado quietly meet. Ranked #20 among U.S. state high points, this marked summit #34 in my ongoing high-pointing journey. And despite the name, Panorama Point isn’t about sweeping views—it’s about subtlety, solitude, and the story of getting there.
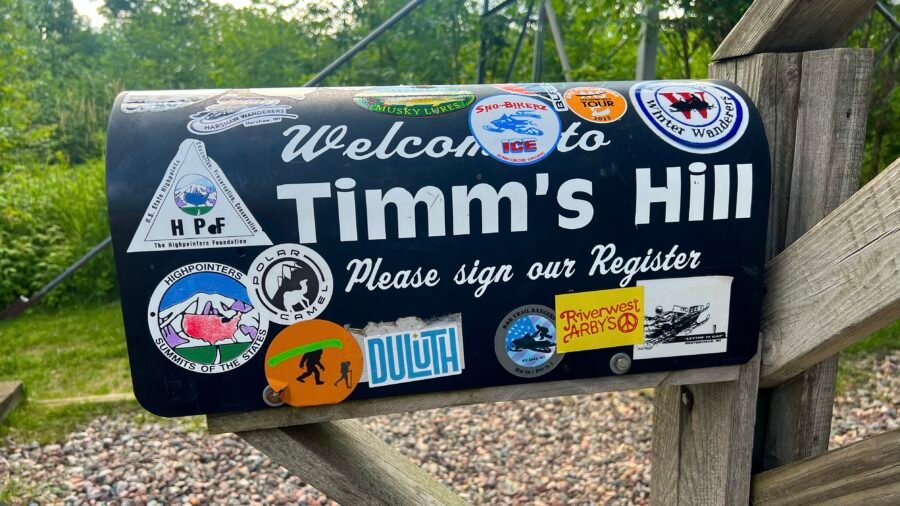
At 1,951 feet above sea level, Timms Hill is the highest natural point in the state of Wisconsin, ranking #39 among U.S. state high points. This marked summit #30 on my high-point journey. While it doesn’t compete with the dramatic peaks of the Rockies or Appalachians, it absolutely holds its own in charm and quiet beauty.
Named after Timothy Gahan, a logger who camped nearby in the late 1800s, Timms Hill wasn’t officially recognized as Wisconsin’s highest point until a resurvey in the 1960s. Before that, many believed Rib Mountain, just west of Wausau, held the title. History has a funny way of correcting itself.
I’m back at it after a winter hiatus from Highpointing and exploring the Discoverer’s List of The Best State Park in Each State! This month’s adventure revolves around “summiting” Charles Mound, the highest natural point in Illinois. This peak sits on private land, and the gracious owners open it to the public the first weekend of June, July, August, and September, from sunrise to sunset. More on that in my next post!
With these key dates in mind, I embarked on my journey. I flew from sunny San Diego, California, to Minneapolis, Minnesota, where I rented an SUV for my month-long journey through the upper Midwest. I’ll be mixing it up between camping in my trusty SUV and staying at a few hotels along the way. I opted to spend the night in Rochester, Minnesota, and picked up some sundries on the way to my hotel. I don’t normally do this, but I ordered everything ahead of time and drove up to the store to have it placed in the back of my SUV. Talk about a game changer and it saved me a ton of time! The next morning, after breakfast at the hotel, I headed for my first stop, Backbone State Park in Dundee, Iowa.
Should a Name Worry You?
We’ve all heard the story: Greenland and Iceland were named with a bit of strategy (and perhaps a touch of mischief). Greenland isn’t exactly a lush paradise, and Iceland isn’t just a block of ice. As I cruised through the charming back roads of Minnesota, I stumbled upon the towns of Harmony and Prosper. Did early settlers name these towns hoping to manifest a little extra luck and good vibes? I wouldn’t be surprised!
Picture: Harmony, Minnesota | Population 1,043
Then, as I meandered through Decorah, Iowa, I spotted signs for the Laura Ingalls Wilder Park and Museum. Shockingly, I learned she was a real person, not just a character from the 70’s and 80’s TV Show “Little House on the Prairie.” Who knew? Apparently, there are several museums, and this one marks her home from 1876-1877. Laura was a writer who penned a beloved series of children’s books about her childhood, aptly titled “Little House on the Prairie.”
And on a completely unrelated note: isn’t it funny how even the tiniest towns in America boast either a Mexican or Chinese restaurant? Next time you’re on a road trip, see if you can spot one!
Backbone State Park and the CCC
I’ve noticed a trend with the Discoverer’s List—many places owe their existence to the hardworking Civilian Conservation Corps (CCC) or were among the first state parks in their area and Backbone State Park fits both categories. The CCC built many of the park’s amenities, including roads, trails, and the historic Stone Lodge, which remains a popular spot for gatherings and events. Their craftsmanship and dedication are evident in the enduring structures that blend seamlessly with the natural environment.
According to the park’s website, “Dedicated in 1920 as Iowa’s first state park, Backbone State Park is one of the most geographically unique locations in Iowa.” That’s no exaggeration! While Iowa may bring to mind sprawling farms and flat plains, Backbone State Park breaks the mold with its more rugged terrain. The Maquoketa River’s carved, steep ridge—dubbed The Devil’s Backbone—rises as the highest point in northeast Iowa, living up to its epic name with an 80-foot ascent above the river. This geological wonder not only defines the park but also offers visitors a glimpse into the area’s rich natural history.
Pictures: South Gate Entrance | About the Civilian Conservation Corp and Iowa Parks
Exploring Backbone’s Natural Wonders
I kicked off my adventure at Backbone State Park by entering through the south entrance and snagging a parking spot near the beach and boathouse. Since it was early and the recent rains had turned the lake a bit muddy, I had the whole place to myself—no one on the beach, no boats on the lake. The boathouse is pretty cool with its rustic charm and vintage vibes. It looks like you can rent paddle boats and canoes there, but it was all closed up on my visit. So after a look around, off I went to explore the rest of the park.
Picture: The Boathouse
Pictures: From the Boathouse – The Beach and the Rental Boats
I started my trek on the East Lake Trail, a 2.4-mile path skirting the lake. It wasn’t the easiest to find at first—I had to do a bit of wandering before finally spotting a trail marker. The initial stretch was a little overgrown, not my idea of a fun hike, but certainly added to the adventure. But as I pressed on, the path opened up, becoming clearer and more inviting. The trail was surprisingly quiet, with only a few people around. I did spot three guys fishing, totally soaking in the peace and quiet. Navigating around a few fallen trees was no big deal, and the rock formations were giving me major upstate New York vibes, which was a cool surprise. Despite the muddy waters and high lake levels from recent rains, the trail offered nice views and a serene experience. About halfway through, I stumbled upon the Bluebird Trail, an easy and inviting 2.2-mile detour, perfect for those looking for a gentler hike.
Pictures: The East Lake Trail Marker? | Beginning of the East Lake Trail | One of the many fallen trees
Pictures: Some of the many Rock Formations
As I continued along the East Lake Trail, I ended up veering off track a bit. I quickly realized that the trails at Backbone State Park aren’t exactly the most well-marked. After crossing a bridge, I unintentionally went straight instead of taking the right path. After some backtracking, I found my way back on track, thanks to seeing some hikers in the distance coming from the direction I needed to go in. There were a few pesky flies buzzing around, but I chuckled seeing them donning full-head nets—I initially thought it was a bit over the top. Little did I know, they would have the last laugh as you’ll find out later.
Pictures: Another Rock Formation | The North End of the Lake | Part of the East Lake Trail
Enter in the City Folk
Ah, city folk—those urban adventurers who brave the great outdoors! The Backbone Trail seems to attract them like moths to a flame. It’s the park’s namesake, it’s flat as a pancake, and at just 0.8 miles, it’s perfect for a quick jaunt. As I came up to the parking lot, I braced myself for the urban invasion. Take a deep breath and prepare for the experience!
I’m pleased to report that, by and large, everyone was civilized and respectful on the trail. Having hiked all over the country and read up on this trail, I was expecting a bit more of an adrenaline rush. It’s wide enough, with a few spots near the edge that might make you gulp (especially for someone afraid of heights), but nothing too heart-stopping.
Pictures: The Backbone Trailhead | The Backbone Trail
Pictures: Views of the Maquoketa River as it winds around both sides of the Devil’s Backbone
Pictures: Along the Backbone Trail
Quirky Moment
From the Backbone Trail, I ventured towards the Six Pines Trail, a short 0.6-mile path that surprisingly led me directly to the Six Pines Campground. Getting to this trailhead was a mix of road and trail, making me wonder why the trails aren’t better connected in such a sprawling park. Later, heading from the East Entrance up to Richmond Springs, I encountered a similar situation—only road access was available.
Anyway, at the Six Pines Trailhead, a car pulled up, and out stepped a woman with a distinct foreign accent, casually puffing on a cigarette. She started up the trail ahead of me but then suddenly veered off into the woods between two marked paths. Not sure where she was headed, but hey, to each their own. This trail had some awesome elevation changes and plenty of valleys to explore.
Pictures: Along the Six Pines Trail
Lost Opportunity
Backbone State Park has camping options for everyone. The South Lake Campground offers modern amenities like electric hookups and showers, all nestled among the trees for that perfect nature-immersed experience. On the flip side, the Six Pines Campground gives off a more secluded, primitive camping vibe. Since it was a summer holiday weekend, online booking required a minimum stay of two nights—Friday and Saturday. Planning for just one night, I kept my options open, knowing walk-ups were possible if space was available. After a day of exploring the park, I set my sights eastward, prepping for my next adventure at Charles Mound.
It’s worth noting that when I stumbled upon the Six Pines Campground, it was completely empty—a missed opportunity in my opinion! While I didn’t check South Lake, there might have been some availability there too. Honestly, the Iowa park system could really benefit from a savvy revenue manager for their online bookings. Just a thought!
Picture: The Empty Six Pines Campground (this is Saturday, day 2 of the weekend requirement)
Oh, the Mosquito Saga!
The last trail before I ventured up to the northern part of the park was the West Lake Trail, a 3.0-mile journey that looped me back to the parking lot and boathouse. Right at the start, I crossed a bridge over a swollen, muddy creek—definitely not your average trickle. On the other side, the trail was a squelchy mess, teeming with mosquitoes. They let up once I pushed past the marshy spots, but it was still a battle of wills.
The hike itself was pleasant enough, though a tad monotonous. I was itching (literally!) to get back to the car and explore the northern reaches of the park. So, I trudged onward, and eventually, the trail wound me around from the beach and over the dam that created the lake.
Pictures: The bridge over the swollen creek and a warning sign about high water
Pictures: The View across the Lake | The Dam
Should of gotten the Ice Cream!
I finally made it back to the parking area, and the little shop was open. The park was getting busier and there were even people on the beach and swimming. (I guess the water wasn’t as muddy as I thought in the lake). I stopped by the little shop, tempted by the advertised smoothies. Unfortunately, it was more like a sugary slushy than a real smoothie – definitely a poor choice. Next time, I’ll stick with ice cream! Also, a shop without postcards? That’s a definite red flag. Lesson learned, folks!
Pictures: The Smoothie Sign | Inside the Shop | My Mango “Smoothie”
No easy way
So, just like with the trails, the roads in the park aren’t exactly seamlessly connected. I had to exit through the South Gate and loop around to the East Gate—a bit of a detour, about a 3-mile trek. The East Gate boasts an old-school sign, likely put up by the CCC back in the day. As you drive in, you’ll spot the Maquoketa River Scenic Overlook, which I hiked below earlier in the day. Unfortunately, thanks to all the lush vegetation, the view wasn’t exactly panoramic right now.
Heading north, the road winds for a little over 3 miles. Near the end, there’s a trail called the Barred Owl Trail that I considered hiking initially, but it’s just 0.4 miles and didn’t seem too thrilling. Along the way, there are a few pit stops. The first one is Balanced Rock, which took me a hot minute to actually find—it’s not exactly conspicuous, unlike the one I’ll tell you about at Devil’s Lake State Park in Wisconsin.
Pictures: The East Gate Sign | Maquoketa River Scenic Overlook | The Overlook View?
A not so Scary Cave, but Scary Springs
Next on the road trip agenda was The Cave. It’s just a short hike from the parking lot—nothing too deep or terrifying, as caves go. Near the parking area, the creek flows under the road, and whoever designed it built tunnels that create these cool whirlpools before the water disappears under the road.
Pictures: The Cave Trailhead | Trail to the Cave | Cool Whirlpool
Picture: The Cave
The final stop on this tour was Richmond Springs. They say it’s a constant 48 degrees, but I wouldn’t dare jump in, even on a scorching hot day. The springs looked a bit spooky, filled with patches that seemed like algae or some kind of growth.
Pictures: Richmond Springs | The Growth in the Springs
My take on Backbone State Park
Reflecting on my visit to Backbone State Park brought back memories of my childhood trips to Green Lakes State Park in upstate New York. Living nearby, it was a fantastic spot for picnics, camping, fishing, hitting the beach on hot summer days, or hiking the many trails. It was the perfect getaway into nature. But in retrospect, would it be a park I’d make a special trip to as a destination? Probably not. When I think about the best park in each state, I feel it should rival a National Park, and honestly, Backbone State Park didn’t quite hit that mark. Is it a fun park? Absolutely. Would I go there if I lived nearby? Hell yes.
Hiking the Elfin Forest: A Day of Adventure and Nature Wonders
If you’re craving an adventure that blends nature’s beauty with a solid workout, hiking at Elfin Forest Recreational Reserve is a must. On my most recent hike, I made my way up the Botanical Trail, transitioned to the Way Up Trail, looped toward the Lake Hodges Overlook, and then descended back down the Way Up Trail. Altogether, it’s a route that delivers steady elevation, wide-open views, and just enough challenge to feel earned.
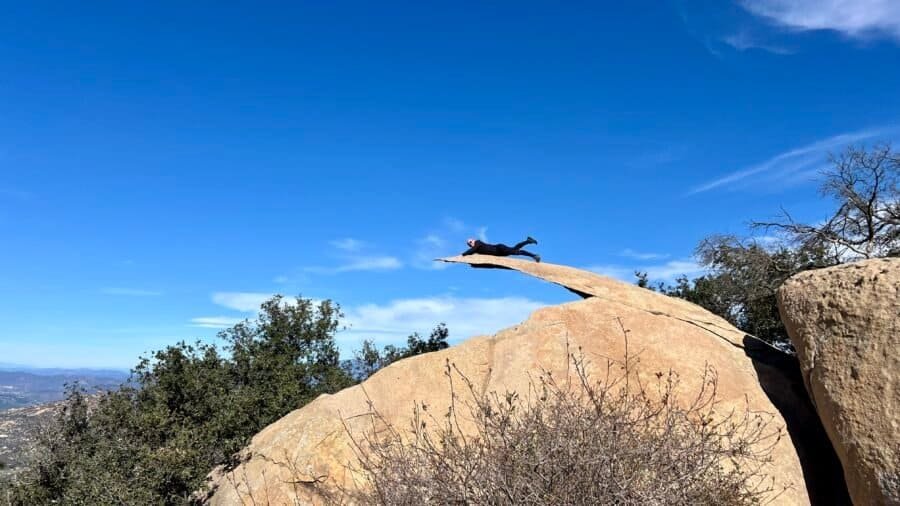
Some places become famous quietly. Others explode thanks to Instagram, hashtags, and gravity-defying photos. Potato Chip Rock is firmly in the second category.
Normally, I avoid viral trail spots like the plague. Between the wannabe influencers, endless selfies, and people blocking narrow trails for “just one more shot,” it can feel like more work than fun. But every once in a while, curiosity wins. And honestly? This one earned its hype.
Add in the fact that it’s a legit cardio workout, and suddenly I was in. So yes — I did take that photo on Potato Chip Rock. No, it never made it to Instagram.
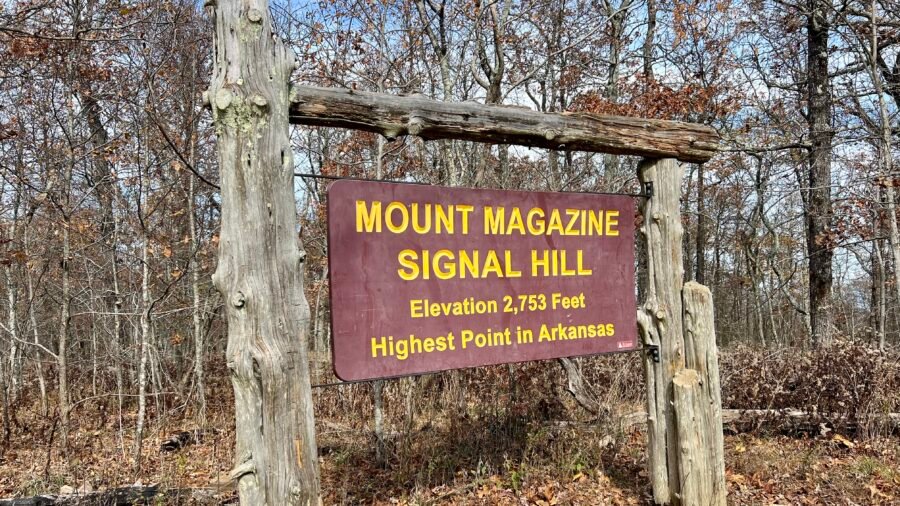
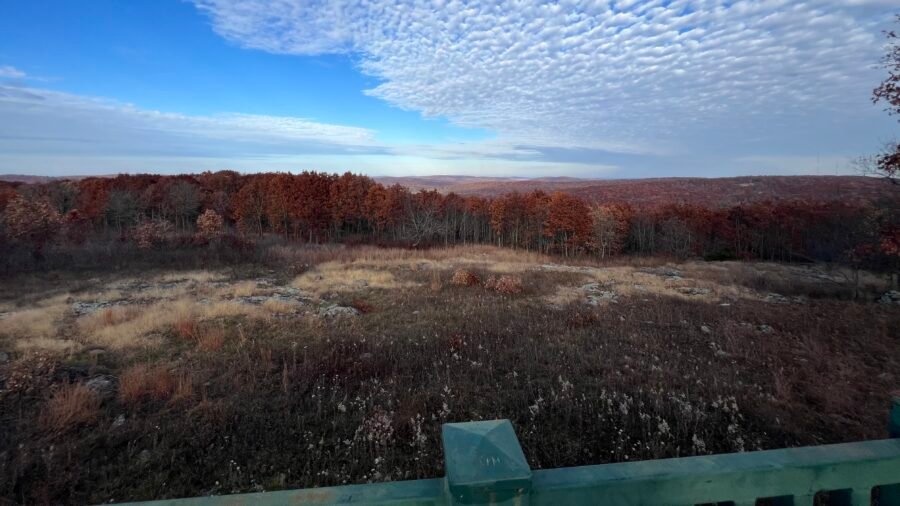
Since Mount Magazine / Signal Hill sits inside Mount Magazine State Park — which is on my list as the Best State Park in Arkansas — I decided to combine both into one post.
The park is about 2 hours west/northwest of Little Rock, roughly 1 hour 15 minutes east of Fort Smith, and a little over 2 hours south of Bentonville — home of Walmart, for you trivia buffs.
Taum Sauk Mountain, located in the St. Francois Mountains of the Missouri Ozarks, is the highest natural point in the state. It stands at 1,772 feet, ranks #41 in State High Points, and was my 24th State High Point.
I sent a photo of me at the “summit” to my friend Pam, who’s originally from Joplin, Missouri. Her reply? “Fantastic!” Followed quickly by: “Had no idea MO had a high point! 🤣”
Honestly… fair.
It’s not exactly a dramatic summit. However, it is a beautiful state park, it’s outdoors, and it carries a surprisingly rich history.
Sassafras Mountain rises to 3,553 feet, making it the highest natural point in South Carolina and ranking #29 among U.S. state high points. Sitting right on the border with North Carolina, Sassafras is one of those summits you can drive to—but after days of moving through the Carolinas, I wanted this one to feel earned.
This stop marked my 19th state high point, and while Sassafras Mountain is approachable by design, it still offered a choice: convenience or effort. I chose the longer way up.
So after a bit of a delay and some crazy weather in Oxford, Alabama (a story for another time) – I was back on track to explore new parks and climb more mountains!
Picture: Crazy Weather in Oxford, AL
DeSoto State Park is off of I-59 between Birmingham, AL, and Chattanooga, TN, and is very close to the Georgia border. It is located in Ft. Payne, AL – which ironically made me think of the Damon Wayans movie – Major Payne. “What are you laughing at, pig-boy? You find a piece of candy in your pocket?” I digress again…
About the Park and some fun facts!
Desoto State Park is nestled atop beautiful Lookout Mountain in scenic Northeast Alabama and is the home of many rushing waterfalls and fragrant wildflowers that will simply take your breath away. (the park’s website words, not mine). The park is split into two parts – DeSoto State Park and DeSoto Falls – both linked by the West Fork of the Little River – but DeSoto Falls is 6 miles north of the main park. DeSoto State Park has plenty to do: kayaking, fishing, swimming, 25 miles of hiking trails, 11 miles of mountain bike trails, rappelling, bouldering, picnicking, and camping.
The park, which bears the name of 16th-century explorer Hernando de Soto, was developed in the 1930s by the Civilian Conservation Corps (CCC) and known as State Park No. 5. When it was dedicated as Desoto State Park on May 24, 1939, it was the largest state park in Alabama. The park’s museum celebrating the CCC’s work in Alabama state parks opened in 2013. Fun Fact: Hernando de Soto was the first European documented as having crossed the Mississippi River. More Jeopardy! trivia for you!
Pictures: Main Park Trail Map | DeSoto Falls Trail Map
DeSoto Waterfall – 3 different views!
I should note first about this post – I try to take copious notes when hiking and visiting parks as I know that I may not post about it for several days or in this case several months. However, the notes for this visit somehow disappeared into the digital universe. So it is forcing me to jog my memory a bit and actually exercise my brain! Not the worst thing to happen, but I may not get every detail correct.
I decided to check out DeSoto Falls first as it was a beautiful day. To get there from DeSoto State Park from the Country Store in the main park, head north to Alabama-89 and turn left. The road will veer right at Wade Gap (but it’s still Alabama-89). Continue until you reach Tutwiler Gap and Alabama-163, turn right here. You know you are in the right place if you see a colorful directional sign on a tree. Alabama-163 will eventually turn into DeSoto Falls Road and dead end into the Picnic Area parking lot (which has a fee of $4 per vehicle – but see my note later in this post). As you are driving toward the Picnic Area, you will see a small gravel parking lot on the right hand side – this is the parking lot for the River and Overlook Trailheads. I started my visit.
Picture: Directional Sign at Titwiler Gap
From this spot – you can reach two of the views of DeSoto Falls. I decided to go to the Basin first and thus took the River Trail. The trailhead is to the right and closer to the road. River Trail is 0.7-miles one-way (Note: I did a combination of trails though – but it still was a total of 0.7-miles one-way). The initial part of the River Trail is down hill slightly and a bit rocky, yet easy to navigate. On this trail you’ll pass several large boulders which are so common to the area. Shortly into the hike, I saw the turnoff for Bluff Trail (0.32-miles in distance) and decided to take it. At this point, I think I was winging it a bit, but I wasn’t too worried as the area isn’t so big that you could get lost. Bluff Trail was a bit steep and continued to be rocky, but nothing too challenging. You’ll pass a cave, and more boulders. Eventually it connects back with the River Trail – where it’s a flat hike out to the Basin.
Pictures: The upper River Trail
Pictures: The Bluff Trail turnoff | The Bluff Trail
Pictures: Along the lower River Trail
When you get to the Basin, you’ll see why you hiked down as you’re rewarded with a massive pool and a spectacular view of the 104-foot waterfall. It was hot enough that if I had the right clothes, I would have taken a dip. Side note: Much of the park information is inconsistent – I have seen park info noting that the falls are anywhere from 5.5 miles to 7 miles north of the park and that the falls are 104 feet and then 107 feet high. Personally, I think they need to hire a proofreader!
Picture: DeSoto Falls Basin
Pictures: DeSoto Fals
After taking in the view, I headed back up the hill to the Overlook Trail and view #2. As you hike up, you’ll pass a bench in case you need to rest a bit – I pushed on. It took me about 40 minutes out and back to do the 1.4 miles – using both The River and Bluff Trails. You connect to the Overlook Trail near the trailhead.
Pictures: Bench | Along the Bluff Trail
The Overlook Trail is pretty flat and an easy 0.9 miles out and back. The beginning of the trail parallels the River and Bluff Trails – giving you a view of the trails below. The Bluff Trail also has a bench rest and take in the scenery. Eventually, you are rewarded with view #2 of DeSoto Falls – although you are a bit further away from the falls than from the basin. Also, as it was the middle of summer, the trees were full and blocked some of the views. Personally, I preferred the view from the Basin – not only were you closer, but it gave you a better appreciation of how high the falls are.
Pictures: Looking down on the trails below from the Overlook Trail
Pictures: The Bluff Trail
Pictures: DeSoto Falls from the Overlook
With two views of the falls down, I decided to head back to the main park and check into my campsite. I chose the Wall Tent Campsite – it’s still rustic and in the Primitive Campground, but it saved me the time of setting up and breaking down my own tent. It was also on a raised platform, keeping me dry – although it hadn’t rained, nor was rain in the forecast. I got settled into camp and then decided to hike a bit more as I still had a few more hours of sunlight.
Pictures: The Primitive Campground Entrance | The Wall Tent Site – courtesy of the Boy Scouts
Falls without Falls
For the afternoon hike, I decided to go on the Orange, Blue, and Red Trails for a total distance of about 4 miles on just the trails. My campsite was just a short distance to the road, so I decided to hike to the Lost Falls (Orange) trailhead instead of driving. I walked out to the main road, then down the road for about a half-mile to the trailhead – adding another 1-mile to my afternoon hike. There is a restroom at this trailhead, which is always a good stop before you start a hike. After my brief pit stop, I was off on the Orange Trail – which for the most part well marked but not too exciting – but I did see an interesting looking mushroom. I soon connected with the Blue Trail as I wanted to see some of the other waterfalls. As a note: for the most part the Orange and Blue Trails run parallel to each other – they are just separated by Laurel Creek.
Pictures: The Orange Trail | Cool looking Mushroom
Pictures: Hiking along the Blue Trail
The first falls to find – Lost Falls. Well, it was certainly lost or maybe it was me, because I passed it and had to double back to check it out – but in my defense, none of the falls are marked well! Sad to say, the creek was pretty dry and Lost Falls was a trickle. The highlight – seeing another cool mushroom!
Pictures: Along the Blue Trail with a cool greenish mushroom
I pressed on towards Laurel Falls. Another note: The trail was a bit overgrown here and I kept wondering if anything was hiding in the grass and going to bite me as I wasn’t hiking with poles. Happy to say, I finished unscathed – no snake bites.
Once I connected to the road, I hiked uphill a little and then connected to the Red Trail. The Red Trail is an interesting trail – it not only is one of North Alabama’s Birding Trails and home to many of North Alabama bird species, such as Belted Kingfishers, as well as migratory birds that winter in Central and South America, Warblers, and Thrushes – but it is also a raised, boardwalk trail, allowing access to those who are physically challenged. I was happy to see it as I am very supportive of making outdoor experiences all-inclusive.
Pictures: Birding Trail | Birds of North Alabama
Pictures: The Boardwalk Trail
Pictures: Along the Boardwalk Trail
I soon connected back to the Orange Trail and made my way back to the trailhead, then to camp. As I was getting settled into my camp for the night, a ranger stopped by to check in and make sure I had a reservation and that I didn’t need anything. I really think he was seeing if I had any contraband – i.e. alcohol. After a short conversation, off he went. I made a fire, watched the fireflies, and enjoyed the peace and quiet.
Day 2 at DeSoto
Although I probably could have seen everything in one day, I was happy to stay in the park. I was up early the next morning – had a quick breakfast and then headed out for my planned hikes. First up – Indian Falls, which is near the Boardwalk Trailhead from yesterday. It’s a quick hike from the parking lot to the falls, but to no surprise, it was dry – so a bit disappointing. So a quick visit and off to the next hike.
Pictures: Indian Falls Area
Pictures: Indian Falls
I drove down to the Lodge, where I parked, and hiked a portion of the Yellow and the Green Trails to see Lodge Falls and the West Fork of the Little River. The Little River was nice, but the falls were a disappointment due to the lack of water.
Pictures: West Fork of the Little River
DeSoto Falls – View #3
I got back in the car and went back north to DeSoto Falls and this time the Picnic Area. And as I mentioned earlier, there is a $4 per vehicle fee, but as I camped in the park, I received a parking pass for here. In all honesty, I wouldn’t pay to park here if it were not included with my camping. I think the other views of the falls are much better. You can walk out to the area above the falls – and then out to an area that will give you a side view of the falls. As I was walking out to the observation area for view #3, I met a really nice couple. They are wild mushroom foragers and actually found wild chanterelles and made eggs with chanterelles for breakfast! I also played ranger and gave them the lay of the land on the falls and hikes they could take.
Pictures: The Upper Falls Area
Pictures: View #3 – from the side | A Look at the Basin from Above
Picture: View of the Upper Falls Area and of the DeSoto Falls
To the left of the dam and the falls is a boat launch. I saw several kayakers and paddle boarders on this portion of the river as you can go upstream a bit. There is also a sandy beach area to hang out and enjoy the sun.
Pictures: West Fork of the Little River | Sandy Beach Area
One of the more interesting parts of this area of the park are the steps down to the observation area. In 2018, DSP Naturalist Brittney Hughes conceived the idea of installing an ambitious public art project at DeSoto Falls—transforming the plain cement stairs leading to the viewing platform into a mosaic work of art. On each of the 43 ‘risers’ is a mosaic of colorful stained glass pieces – each riser is a separate piece of art but seen collectively they create a design that is pleasing to the eye. Brittney’s design features the West Fork of Little River flowing down the length of the steps, and a famous John Muir quote in the middle of the design: “Everybody needs beauty as well as bread, places to play in and pray in, where nature may heal and give strength to body and soul”~ John Muir.
Pictures: The Public Art Project and the Mosaic Risers
With DeSoto State Park checked off my list, I headed towards Georgia and Cloud Canyon State Park!