sharing my love for philanthropy, cooking, and adventure

Sunrise illuminating the summit glacier on Mount Kilimanjaro, with ice formations in the foreground and a sea of clouds in the background.

Tag: Travel Page 7 of 9

Cloudland Canyon State Park | Georgia

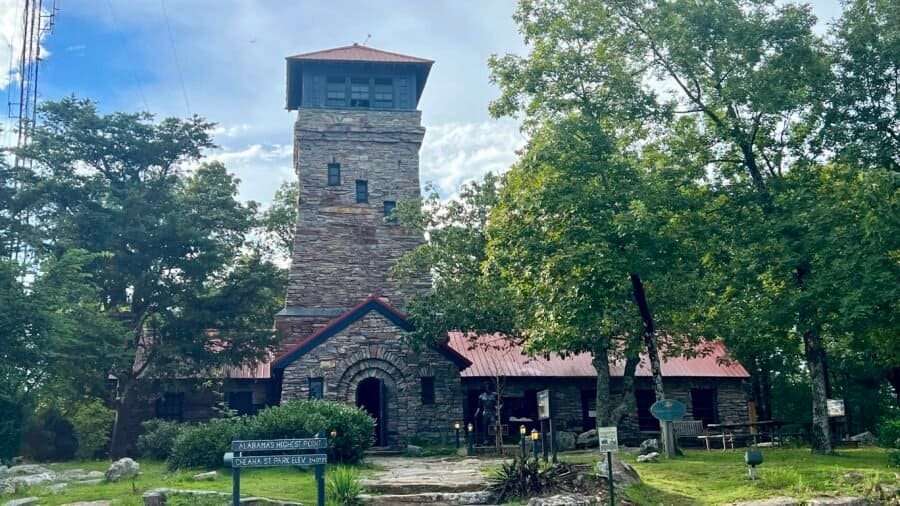
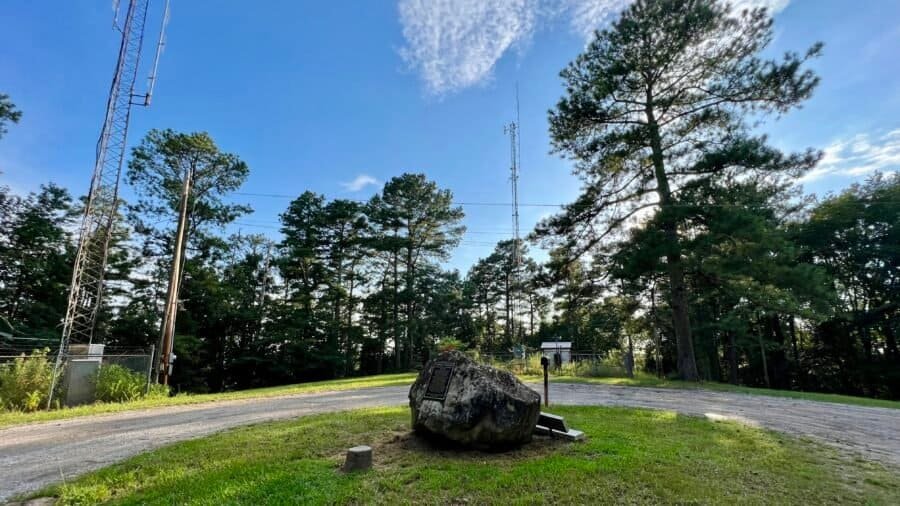
Cloudland Canyon State Park was a short 40-minute drive from my last park – DeSoto State Park in Alabama. On my way up to the park – driving along the top of Lookout Mountain and looking at real estate signs – I was reintroduced to a mountain term – The Brow. The brow is the ridge that tops the mountain, I.e. being on the brow is worth about $1MM or said another way houses on the brow were significantly more expensive than those across the street. All joking aside, the views from the Brow were breathtaking – should I say million-dollar views. lol

Pictures: Park Entrance | Map and Overview of Park

About the Park…

Cloudland Canyon State Park is one of my favorite parks. It’s located on the western edge of Lookout Mountain and is one of the largest and most scenic parks in the state. The park features thousand-foot deep canyons, sandstone cliffs, wild caves, waterfalls, cascading creeks, dense woodland and abundant wildlife. With 64 miles of hiking trails, 30 miles of biking trails in the newly developed Five Points Recreation Area and along the Cloudland Connector Trail, and 16 miles of horseback riding trails, there’s plenty to explore. The park also offers disc golf, a fishing pond, picnicking areas, and overlooks. If you’re looking to spend the night, there are fully-equipped and comfortable cottages, quirky yurts, and several different types of camping and backpacking options available. The entrance fee is $5 per vehicle, making it a reasonable option for a day trip.

Be ahead of the curve and seize the day!

Being a mere 30-minutes from Chattanooga and NE Georgia, Cloudland Canyon State Park is a very popular park and can get crowded. I am SO happy that I got there early and avoided the crowds, wannabe Instagram influencers, and city folk (well almost). And yes, I actually like a park that has city folk! Anyway, off I went for a series of hikes totaling about 8-miles for the day. Note: I was able to park in one place – near the Main Overlook – and hike all three of the trails I went on. From this parking lot, you get some great views of the canyon as well.

Pictures: Trail Map and Legend

Picture: Morning view of the Canyon

Let’s start the day with some elevation change and the Waterfalls Trail…

I’d be happy to rewrite the text to make it clearer. Here’s the corrected version:

According to the park brochure, the Waterfalls Trail is 1.8 miles roundtrip from the Main Trailhead. However, I measured it to be 2 miles, which includes the distance from the parking lot and a little detour that I took (which I will explain later in this post). The park labels this hike as strenuous due to the 600 steps one way, but I found it to be a good cardio workout. If you’re hiking with your dog, note that the stairs are made of metal grating, which could be challenging for some dogs. Since it was a short out-and-back hike, I didn’t bring a backpack or daypack, and I wore shorts, a t-shirt, and sneakers (which were key considering the number of stairs). Note that the trails are very well marked, as you can see in my pictures.

Pictures: Directional Sign from the Parking Lot area | About the Falls

Pictures: Main Trailhead | Some of the steps are dirt and gravel | Others metal grates and wood

As noted in the picture above about the waterfalls, the quantity of water over the falls varies greatly from month to month, but in general, winter and early spring offer the greatest flow. It was August, but I am happy to say it wasn’t a trickle – but certainly no torrent.

After parking your car, it’s just a short hike to the Main Trailhead. You will see a marker for several trails there. The trail is mostly downhill, with a few flat areas as you go through the canyon. After about half a mile, you will come across a sign pointing towards Cherokee Falls. The hike to the falls is relatively easy and not too long. Cherokee Falls is the first waterfall on Daniel Creek and drops 65 feet into a large pool.

Pictures: On the hike down to Cherokee Falls

Pictures: Daniel Creek

Picture: Cherokee Falls

Pictures: A rare picture of myself (that isn’t a selfie) | The rock walls from around the falls

Once you reach this point, you should head back to where the trail separated and then make your way down to Hemlock Falls. Along this trail, you will come across various spots where you can take a break, catch your breath and relax for a while. Although it may not be as necessary on the way down, these resting spots can be quite helpful when making your way back up.

Pictures: Where the trail splits for the two different waterfalls | One of the areas to sit and rest

Pictures: Canyon Walls on the way down to Hemlock Falls

Hemlock Falls is about another ½-mile down where you’ll see another split in the trail – to the left Hemlock Falls and to the right Sitton’s Gulch Trail. I would recommend you go a short distance – about 150-feet – on Sitton’s Gulch Trail to the bridge that crosses Daniel Creek. You’ll get a great view of the creek and also a good appreciation on how far down in the canyon you have gone. Back to Hemlock Falls and the end of the trail I went. Hemlock Falls is the second falls from the top of Daniel Creek and drops 100-feet. As this was the end of the trail, it was back up to the top – 600 stairs to go!

Pictures: Trail Split for Hemlock Falls and Sitton’s Gulch Trail | Bridge over Daniel Creek | Daniel Creek

Picture: Hemlock Falls

Pictures: The Stairs – looking up – where I am headed back to the top

Time for a wardrobe change!

I planned to hike the West Rim Loop next, which is a 5-mile loop. Considering the distance and time of year, I decided to change into boots and carry a day pack containing some snacks and water. I preferred boots as I wasn’t using poles while hiking and being summer, I was concerned about Timber Rattlesnakes.

The West Rim Loop Trail is a popular five-mile hike that was once rated as one of the top ten hikes in the U.S. by Backpacker Magazine. The trail has a lollipop shape and offers several overlooks that showcase the park’s rugged geology, deep canyons, dense woodland, and stunning views beyond. To begin the hike, hikers start from the Main Trailhead and cross over Daniel Creek. The trail then heads uphill towards a rocky promontory.

Pictures: Bridge of Daniel Creek | Daniel Creek

Pictures: West Rim Trail | Cave along the trail

Shortly into the hike, you’ll pass Yurt Village. I personally have a fascination with Yurts and actually stayed at one in Marfa, Texas at El Cosmico. Along the trail, I also saw a cool mushroom – yes I am addicted to mushrooms! Soon you’ll reach the brim – and as you will see in my pictures, although there are railings and safe guards in many areas, in other areas there are none and it is a LONG way down!

Pictures: Yurt Village from the West Loop Trail | Directional Sign | Yurt Village

Pictures: The Cool Mushroom | View of the Canyon | A long way down!

After hiking for a mile, the loop component of the trail starts, which is three miles long. During this section, you’ll come across many overlooks. On one of these overlooks, I met a man named Lance from Cleveland, TN, near Chattanooga. We ended up hiking together for the last two miles of the trail. Although I enjoy hiking alone, it was nice to have company.

Pictures: Loop begins here | Yellow blazes mark the West Rim Trail

As mentioned earlier, the trails are well-marked and include directions to scenic overlooks. From the first overlook, you can see the main overlook where I parked.

Pictures: Directional to Scenic Overlook | Looking towards the main overlook | Scenic overlook view

There are 4 overlooks on this part of the trail, and they are all on the first half of the hike. You’ll also come across some cool boulders that you have to jump over to get to the view (that is if you feel comfortable doing so). After the fourth overlook, the trail moves in and away from the brim.

Picture: View from the second overlook

Pictures: View from the third overlook | No railing here – it’s a long way down!

Picture: View from the fourth overlook

Pictures: Where I did some boulder jumping

At about mile four, you complete the loop and then head back to the Main Trailhead, retracing your steps of the first mile. The trail got a bit busier at this point – and city folk definitely were out. Case in point, there was this young girl and guy who came barreling down the trail and didn’t even move to the side, despite uphill hikers having the right of way. I wish people would learn hiking/trail etiquette. Anyway, Lance and I parted ways at the parking lot, and I was off for my third hike of the day. But first….

Wardrobe change #3!

I decided to finish the day by hiking the Overlook Trail – and I am so happy I did! It’s an easy trail – one-mile roundtrip – and I actually changed into my flip-flops as my feet needed a break after the two-morning hikes. The trail offers picturesque views into the canyon. It leads along the rim of the canyon and behind the Interpretive Center to the Main Overlook, then continues onto a second overlook. This trail is mostly flat, and benches along the way offer opportunities for relaxation and contemplation. The Overlook Trail is marked by light blue blazes on trees. (not that you really need them). All in all, I great day of hiking with amazing views. I’d highly recommend visiting Cloudland Canyon State Park if you are in the area, and I would even suggest making a special trip here.

Pictures: Relaxing in flip-flops before I tackle the Overlook Trail | View from the Overlook Trail

Pictures: Incredible views from the Main Overlook

Pictures: Final view of the Canyon | Obligatory selfie

Date of Visit: 19 August 2023

DeSoto State Park | Alabama

So after a bit of a delay and some crazy weather in Oxford, Alabama (a story for another time) – I was back on track to explore new parks and climb more mountains!

Picture: Crazy Weather in Oxford, AL

DeSoto State Park is off of I-59 between Birmingham, AL, and Chattanooga, TN, and is very close to the Georgia border. It is located in Ft. Payne, AL – which ironically made me think of the Damon Wayans movie – Major Payne. “What are you laughing at, pig-boy? You find a piece of candy in your pocket?” I digress again…

About the Park and some fun facts!

Desoto State Park is nestled atop beautiful Lookout Mountain in scenic Northeast Alabama and is the home of many rushing waterfalls and fragrant wildflowers that will simply take your breath away. (the park’s website words, not mine). The park is split into two parts – DeSoto State Park and DeSoto Falls – both linked by the West Fork of the Little River – but DeSoto Falls is 6 miles north of the main park. DeSoto State Park has plenty to do: kayaking, fishing, swimming, 25 miles of hiking trails, 11 miles of mountain bike trails, rappelling, bouldering, picnicking, and camping.

The park, which bears the name of 16th-century explorer Hernando de Soto, was developed in the 1930s by the Civilian Conservation Corps (CCC) and known as State Park No. 5. When it was dedicated as Desoto State Park on May 24, 1939, it was the largest state park in Alabama. The park’s museum celebrating the CCC’s work in Alabama state parks opened in 2013. Fun Fact: Hernando de Soto was the first European documented as having crossed the Mississippi River. More Jeopardy! trivia for you!

Pictures: Main Park Trail Map | DeSoto Falls Trail Map

DeSoto Waterfall – 3 different views!

I should note first about this post – I try to take copious notes when hiking and visiting parks as I know that I may not post about it for several days or in this case several months. However, the notes for this visit somehow disappeared into the digital universe. So it is forcing me to jog my memory a bit and actually exercise my brain! Not the worst thing to happen, but I may not get every detail correct.

I decided to check out DeSoto Falls first as it was a beautiful day. To get there from DeSoto State Park from the Country Store in the main park, head north to Alabama-89 and turn left. The road will veer right at Wade Gap (but it’s still Alabama-89). Continue until you reach Tutwiler Gap and Alabama-163, turn right here. You know you are in the right place if you see a colorful directional sign on a tree. Alabama-163 will eventually turn into DeSoto Falls Road and dead end into the Picnic Area parking lot (which has a fee of $4 per vehicle – but see my note later in this post). As you are driving toward the Picnic Area, you will see a small gravel parking lot on the right hand side – this is the parking lot for the River and Overlook Trailheads. I started my visit.

Picture: Directional Sign at Titwiler Gap

From this spot – you can reach two of the views of DeSoto Falls. I decided to go to the Basin first and thus took the River Trail. The trailhead is to the right and closer to the road. River Trail is 0.7-miles one-way (Note: I did a combination of trails though – but it still was a total of 0.7-miles one-way). The initial part of the River Trail is down hill slightly and a bit rocky, yet easy to navigate. On this trail you’ll pass several large boulders which are so common to the area. Shortly into the hike, I saw the turnoff for Bluff Trail (0.32-miles in distance) and decided to take it. At this point, I think I was winging it a bit, but I wasn’t too worried as the area isn’t so big that you could get lost. Bluff Trail was a bit steep and continued to be rocky, but nothing too challenging. You’ll pass a cave, and more boulders. Eventually it connects back with the River Trail – where it’s a flat hike out to the Basin.

Pictures: The upper River Trail

Pictures: The Bluff Trail turnoff | The Bluff Trail

Pictures: Along the lower River Trail

When you get to the Basin, you’ll see why you hiked down as you’re rewarded with a massive pool and a spectacular view of the 104-foot waterfall. It was hot enough that if I had the right clothes, I would have taken a dip. Side note: Much of the park information is inconsistent – I have seen park info noting that the falls are anywhere from 5.5 miles to 7 miles north of the park and that the falls are 104 feet and then 107 feet high. Personally, I think they need to hire a proofreader!

Picture: DeSoto Falls Basin

Pictures: DeSoto Fals

After taking in the view, I headed back up the hill to the Overlook Trail and view #2. As you hike up, you’ll pass a bench in case you need to rest a bit – I pushed on. It took me about 40 minutes out and back to do the 1.4 miles – using both The River and Bluff Trails. You connect to the Overlook Trail near the trailhead.

Pictures: Bench | Along the Bluff Trail

The Overlook Trail is pretty flat and an easy 0.9 miles out and back. The beginning of the trail parallels the River and Bluff Trails – giving you a view of the trails below. The Bluff Trail also has a bench rest and take in the scenery. Eventually, you are rewarded with view #2 of DeSoto Falls – although you are a bit further away from the falls than from the basin. Also, as it was the middle of summer, the trees were full and blocked some of the views. Personally, I preferred the view from the Basin – not only were you closer, but it gave you a better appreciation of how high the falls are.

Pictures: Looking down on the trails below from the Overlook Trail

Pictures: The Bluff Trail

Pictures: DeSoto Falls from the Overlook

With two views of the falls down, I decided to head back to the main park and check into my campsite. I chose the Wall Tent Campsite – it’s still rustic and in the Primitive Campground, but it saved me the time of setting up and breaking down my own tent. It was also on a raised platform, keeping me dry – although it hadn’t rained, nor was rain in the forecast. I got settled into camp and then decided to hike a bit more as I still had a few more hours of sunlight.

Pictures: The Primitive Campground Entrance | The Wall Tent Site – courtesy of the Boy Scouts

Falls without Falls

For the afternoon hike, I decided to go on the Orange, Blue, and Red Trails for a total distance of about 4 miles on just the trails. My campsite was just a short distance to the road, so I decided to hike to the Lost Falls (Orange) trailhead instead of driving. I walked out to the main road, then down the road for about a half-mile to the trailhead – adding another 1-mile to my afternoon hike. There is a restroom at this trailhead, which is always a good stop before you start a hike. After my brief pit stop, I was off on the Orange Trail – which for the most part well marked but not too exciting – but I did see an interesting looking mushroom. I soon connected with the Blue Trail as I wanted to see some of the other waterfalls. As a note: for the most part the Orange and Blue Trails run parallel to each other – they are just separated by Laurel Creek.

Pictures: The Orange Trail | Cool looking Mushroom

Pictures: Hiking along the Blue Trail

The first falls to find – Lost Falls. Well, it was certainly lost or maybe it was me, because I passed it and had to double back to check it out – but in my defense, none of the falls are marked well! Sad to say, the creek was pretty dry and Lost Falls was a trickle. The highlight – seeing another cool mushroom!

Pictures: Along the Blue Trail with a cool greenish mushroom

I pressed on towards Laurel Falls. Another note: The trail was a bit overgrown here and I kept wondering if anything was hiding in the grass and going to bite me as I wasn’t hiking with poles. Happy to say, I finished unscathed – no snake bites.

Once I connected to the road, I hiked uphill a little and then connected to the Red Trail. The Red Trail is an interesting trail – it not only is one of North Alabama’s Birding Trails and home to many of North Alabama bird species, such as Belted Kingfishers, as well as migratory birds that winter in Central and South America, Warblers, and Thrushes – but it is also a raised, boardwalk trail, allowing access to those who are physically challenged. I was happy to see it as I am very supportive of making outdoor experiences all-inclusive.

Pictures: Birding Trail | Birds of North Alabama

Pictures: The Boardwalk Trail

Pictures: Along the Boardwalk Trail

I soon connected back to the Orange Trail and made my way back to the trailhead, then to camp. As I was getting settled into my camp for the night, a ranger stopped by to check in and make sure I had a reservation and that I didn’t need anything. I really think he was seeing if I had any contraband – i.e. alcohol. After a short conversation, off he went. I made a fire, watched the fireflies, and enjoyed the peace and quiet.

Day 2 at DeSoto

Although I probably could have seen everything in one day, I was happy to stay in the park. I was up early the next morning – had a quick breakfast and then headed out for my planned hikes. First up – Indian Falls, which is near the Boardwalk Trailhead from yesterday. It’s a quick hike from the parking lot to the falls, but to no surprise, it was dry – so a bit disappointing. So a quick visit and off to the next hike.

Pictures: Indian Falls Area

Pictures: Indian Falls

I drove down to the Lodge, where I parked, and hiked a portion of the Yellow and the Green Trails to see Lodge Falls and the West Fork of the Little River. The Little River was nice, but the falls were a disappointment due to the lack of water.

Pictures: West Fork of the Little River

DeSoto Falls – View #3

I got back in the car and went back north to DeSoto Falls and this time the Picnic Area. And as I mentioned earlier, there is a $4 per vehicle fee, but as I camped in the park, I received a parking pass for here. In all honesty, I wouldn’t pay to park here if it were not included with my camping. I think the other views of the falls are much better. You can walk out to the area above the falls – and then out to an area that will give you a side view of the falls. As I was walking out to the observation area for view #3, I met a really nice couple. They are wild mushroom foragers and actually found wild chanterelles and made eggs with chanterelles for breakfast! I also played ranger and gave them the lay of the land on the falls and hikes they could take.

Pictures: The Upper Falls Area

Pictures: View #3 – from the side | A Look at the Basin from Above

Picture: View of the Upper Falls Area and of the DeSoto Falls

To the left of the dam and the falls is a boat launch. I saw several kayakers and paddle boarders on this portion of the river as you can go upstream a bit. There is also a sandy beach area to hang out and enjoy the sun.

Pictures: West Fork of the Little River | Sandy Beach Area

One of the more interesting parts of this area of the park are the steps down to the observation area. In 2018, DSP Naturalist Brittney Hughes conceived the idea of installing an ambitious public art project at DeSoto Falls—transforming the plain cement stairs leading to the viewing platform into a mosaic work of art. On each of the 43 ‘risers’ is a mosaic of colorful stained glass pieces – each riser is a separate piece of art but seen collectively they create a design that is pleasing to the eye. Brittney’s design features the West Fork of Little River flowing down the length of the steps, and a famous John Muir quote in the middle of the design: “Everybody needs beauty as well as bread, places to play in and pray in, where nature may heal and give strength to body and soul”~ John Muir.

Pictures: The Public Art Project and the Mosaic Risers

With DeSoto State Park checked off my list, I headed towards Georgia and Cloud Canyon State Park!

Dates of Visit: 17 & 18 August 2023

Bunker Observation Tower at Cheaha Mountain, Alabama’s highest point, surrounded by forest in Cheaha State Park.

Cheaha Mountain | Alabama (#16)

Cheaha Mountain—Alabama’s natural high point—was my 16th state high point, rising to 2,407 feet above sea leveland ranking #35 among U.S. State High Points. The summit is located within Cheaha State Park, the oldest state park in Alabama, and the southernmost extension of the Appalachian Mountain chain.

Tishomingo State Park | Mississippi

A little park history…

Located in the foothills of the Appalachian Mountains, Tishomingo State Park is steeped in history and scenic beauty. Archaeological excavations confirm the presence of Paleo Indians in the area now encompassed by the park as early as 7000 B.C.! The park takes its name from the leader of the Chickasaw nation, Chief Tishomingo. Today’s visitors to Tishomingo State Park discover the same timeless natural beauty that enchanted the Indians centuries ago. Tishomingo offers a unique landscape of massive rock formations and fern-filled crevices found nowhere else in Mississippi. Massive boulders blanketed in moss dot the hillsides, and colorful wildflowers border trails once walked by Native Americans.

Getting there…

The park is located 20-minutes south of Woodall Mountain – the highest natural point in Mississippi – which I blogged about recently. Here’s a link to that post Woodall Mountain Post. To get here, I drove on a portion of the famous Natchez Trace Parkway, the premier highway of the early 1800s and a modern scenic parkway, which runs directly through the park. I have more information on the Natchez Trace in my Woodall Mountain post.

Once you exit the Natchez Trace Parkway, you’ll get on State Park Road (Mississippi-90), then you’ll pass a park sign and then eventually a larger park monument sign, before you get to the entrance. The entrance fee is $2.00 per person, so pretty inexpensive as parks go. But free is best in my opinion.

Pictures: Park sign on Mississippi-90 | State Park Road/Mississippi-90 | Larger park monument sign

First Stop – The Office

It should come to no surprise for anyone who has followed this blog, my first stop was the office to chat with rangers about the park, to get a lay of the land, to find out which hikes were must-do’s and to find out what wildlife I should be aware of – Bears? Snakes? Big Foot? As it stands, I did see a bear near the office when I was about to start my first hike!

Pictures: My bear sighting! | Map of Tishomingo State Park Trails

I’m in for a hot, humid and buggy day!

The ranger recommended I start out with the Flat Rock Trail, which was right by the office. There is a small parking lot on the right of the entrance – where I parked. This trail is a 3-mile loop, but I opted shorten it at the suggestion of the ranger and just go to the campground and turn around – a 1.6-mile out and back hike. The trail starts out crossing a creek – which has a small wooden bridge. You’ll also see that State Park Road (the road you enter into the park) also has a bridge over the creek. The ranger suggested I go up and under the bridge, which I did – it was pretty cool!

Pictures: State Park Road Bridge | The start of the Flat Rock Trail | The Trailhead Area

The first half of the hike was the best part as you go by some really cool rock formations and boulders, and through some neat passageways. I can only imagine back in the day – would these passageways be safe or would I be easy prey for the Chickasaw? The rest of the trail is nice and you’re basically hiking through the woods. There are a couple of areas that are up and down, but nothing too difficult. The trail was 99% dry and there were a few bugs out, but the day was just starting and it was getting quite humid and hot. I found the trail well marked and outside of a couple of trees down, it was pretty clear and easy to navigate.

Pictures: Rock formations and boulders at the beginning of the hike

Pictures: One of the rock passageways | Rock formation

Pictures: One of the down trees | My turnaround point for the Flat Rock Trail. The trail comes in from the upper right corner of the picture.

Once back at the office, I drove further into the park and stopped by the Pioneer Cabin and Well House for a quick visit.

Pictures: Pioneer Cabin | Well House

Pictures: From the area near the Pioneer Cabin

I would have been part of the CCC…

I then drove down and parked near the park’s famous Swinging Bridge. It was constructed in 1939 by the Civilian Conservation Corps. The CCC was a voluntary government work relief program that ran from 1933 to 1942 in the United States for unemployed, unmarried men ages 18–25 who had difficulty finding jobs during the Great Depression in the United States. The program was a major part of President Franklin D. Roosevelt’s New Deal that supplied manual labor jobs related to the conservation and development of natural resources in rural lands owned by federal, state, and local governments. If I had lived back then, I probably would have been part of the CCC. After all, I have the right physique as I think my abs look like the one in the statue! lol.

Pictures: Statue and plaque commemorating the Civilian Conservation Corps Worker

Five Person Limit

Back to the Swinging Bridge which has a sign noting a “5 person limit.” Somehow, I think this rule has been violated a bit in the past – just saying. Since it was a quiet day, I was the only person on the bridge – and even with me on it solo – it did swing a bit. I can only imagine how much it moves when 5 people are on the bridge! The bridge spans Bear Creek – which was quite muddy and flowing at a good pace due to the recent rain. After you cross the creek, you’ll connect with the Outcroppings Trail – my next hike.

Pictures: The Swinging Bridge and 5-Person Limit Sign

Pictures: Swinging Bridge | Muddy Bear Creek

Picture: Outcroppings Trail side of the Swinging Bridge

Rare Salamanders and Scorpions?

I decided to take the trail to the right and follow along Bear Creek. You meander along the river for 9/10 of a mile. It is an easy hike with some small ravines, lots of rocks and a small brook. At one point I came across really cool tree that over time grew at a bent angle. I love how mother nature and trees adapt to their surroundings and sometimes they don’t just grow up as straight trees – rebels that buck the system. As I hiked, I kept an eye out for two rare species of creatures that are found predominately in the park and Tishomingo County – Vaejovis carolinianus, commonly called the Southern Devil Scorpion or unstripped scorpion – and the state endangered Green Salamander (Aneides aeneus). The ranger at the office gave me the heads up about these creatures – yet another reason to stop by the office or visitor center.

Interestingly, at least to me, while scorpions frequently live in hot and dry areas, there are at least two scorpion species are at home in Mississippi’s often cold and wet climate – Vaejovis carolinianus, which I noted above and found only in northeast Mississippi where I am; and Centruroidis vittatus, known as the striped scorpion, found sporadically in central and southern parts of the state. Unfortunately, I didn’t come across any, I think you have to really search for them, in essence stop and pull up rocks to find such creatures. But I did see a frog! And according to Google Lens – I think it is a Pickerel Frog.

Picture: My Pickerel Frog sighting!

Pictures: Outcroppings Trail along muddy Bear Creek | Cool Bent Tree on the Trail

Magic Mushrooms?

I came across some cool mushrooms – one of my fascinations in nature – and this pool of water that had an iridescent hue to it. And no, I didn’t eat the mushrooms before I saw the water – so I wasn’t tripping out and hallucinating from eating the “magic mushrooms.”

Pictures: Mushrooms | Iridescent pool of water

The trail soon goes up and away from the creek. Personally, I think this is where the trail gets more interesting. You get a nice view of the valley below and will come across some neat boulders, rock formations and caves – I’m guessing at this point you’re learning about my fascination with rocks and boulders as well. I later found out that the Chickasaw Indians actually lived in these caves when they inhabited the area. I did see any in the caves, but I did see one on the roadside as I drove through the park.

Pictures: Boulders and rocks on the upper portion of the trail

Pictures: Caves and overhangs where the Chickasaw lived

Picture: The one Chickasaw Indian I saw by the roadside

Pictures: More rock formations | Looking down from the rocks above

A Full Day of Hiking

The trail loops back the Swinging Bridge – where I was parked. I got back into my car and was off for my next hike – the CCC Camp Trail. I drove back up to the Pioneer Cabin, and parked across the street, near the picnic area. I should note that I later realized I could have just kept my car at the Swinging Bridge as you’ll see as you read on, but I ended up being happy that I drove to this parking spot. It helped break up the day for me, it gave me an opportunity to have some water, a quick snack and to be in the comfort of my car’s air-conditioning, and it gave me time to figure out where the CCC Camp Trail started. This trail is a 3-mile loop that starts out generally flat, then drops down to the Swinging Bridge, then goes along Bear Creak and finally back uphill to the parking lot.

As I sat across the street and looked at the Pioneer House, I scanned the roadside and to far left of the Pioneer House, was a set of stairs – this is the CCC Camp Trailhead. So up the stairs I went on my last excursion in the park. Soon after you ascend the stairs, you’ll pass some more rock formations and boulders that are heavily covered in moss due to the shade.

Pictures: Moss covered rocks | CCC Camp Trail

Is that a UFO?

The trail follows the road for a bit – not my favorite – but you’re up high enough above the road and luckily there were only very few cars – so not alot of street noise. Otherwise it would have reminded me of Lincolnwood State Park in Rhode Island – which was not a favorite hike. You’ll eventually head down the hill, past the Swinging Bridge and through a parking lot. At the far end of the parking lot, the trail resumes and it’s at this point that you hike parallel to a Disc Golf Course – so keep a keep eye out for flying discs!

Pictures: The Disc Golf Course

Shortly after you pass the course, you’ll cross a bridge and then the trail got a bit dicey as there were alot of trees down in this section of the park. It wasn’t difficult to follow the trail, you just had to take a few detours around the downed trees. Before you head back up the hill, there is a directional sign – one of the few signs I saw on the trails. So up the hill I went to the Pioneer Cabin, past some more downed trees and back to the car.

Pictures: Bridge | Downed Trees | Directional Sign

On the way out of the park, I stopped by the glamping tent sites, courtesy of TENTRR. I have yet to stay at a TENTRR campsite, but do have the app on my phone. Tishomingo State Park is an interesting park with some cool rock formations and history. I’d definitely recommend a visit if you’re in the area, but it’s definitely not a destination state park like Ricketts Glen State Park. At least in my opinion.

Picture: Glamping site courtesy of TENTRR

Date of Visit: 13 August 2023

Woodall Mountain summit with plaque, boulder, and radio towers in Mississippi

Woodall Mountain | Mississippi (#15)

About Woodall Mountain — History 101

Woodall Mountain is the highest natural point in the U.S. state of Mississippi at 806 feet and ranks #47 in State High Points. It is located just off Mississippi Highway 25, south of Iuka in Tishomingo County in the northeast part of the state. I also happened to combine this trip with my visit to Tishomingo State Park (on my list of Best State Parks), which I will blog about at a later date.

Road sign marking Black Mountain, Kentucky’s highest point at 4,145 feet in Harlan County

Black Mountain | Kentucky (#14)

At 4,145 feet above sea levelBlack Mountain is the highest point in the Commonwealth of Kentucky, ranking #27 among U.S. state high points and sitting quietly along the Kentucky–Virginia border. This was my 14th state high point, and while the hike itself turned out to be fairly uneventful, the experience surrounding it was anything but.

Wild ponies grazing in a misty meadow at Grayson Highlands State Park.

Mount Rogers | Virginia (#13)

Mount Rogers sits within the Mount Rogers National Recreation Area and rises to 5,729 feet above sea level, ranking #19 among U.S. state high points. It also marked my 11th summit on this high-pointing journey.

The Mount Rogers National Recreation Area is expansive, with four designated wilderness areas, more than 400 miles of trails, eleven campgrounds, and scenic drives like the Mount Rogers Scenic Byway and the road to Whitetop Mountain. It’s also home to 60 miles of the Appalachian Trail and 18 miles of the Virginia Creeper Trail. This corner of southwest Virginia is truly one of my favorite parts of the country.

Grassy knoll at Fort Reno Park marking Point Reno, the highest point in Washington, D.C.

Point Reno | District of Columbia (#12)

At a Glance

At 409 feetPoint Reno is the highest point in the District of Columbia. It ranks #50 among U.S. state and district high points (with Florida at #51) and was my 12th overall.

It still feels a little funny checking off a “high point” in Washington, D.C.—especially coming on the heels of Mount Washington and Mount Katahdin—but it’s on the list, so off I went to the nation’s capital.

Starved Rock State Park | Illinois

As I continue to travel across the county visiting parks, I’ve come to the conclusion that there are two types of parks for me – destination parks that offer a great outdoors experience and everyday parks that would be great to visit frequently if I lived nearby. Both types of parks may have similar features such as waterfalls, lakes, miles of trails, and picnic areas, but the everyday parks tend to be busier, have more kids and definitely more “city folk.” For me – every day parks are good for trail running or a brisk hike to get my steps in or to take the dog. I’d classify Starved Rock State Park is an everyday park.

Located in Oglesby, Illinois – and about 90 miles or 1 hr. 30 minutes west to southwest of downtown Chicago – Starved Rock was voted the #1 Attraction in the State of Illinois and touts itself as a world apart from anything else in Illinois – with amazing, seasonal waterfalls (an important note as there are times during the year where many of the falls run dry); 13 miles of trails and 18 canyons to explore; and the Illinois River which offers fishing, boating, extraordinary views and great places to relax. The main parking lot gives you access to most of the park, however as go east, there are more parking lots making it easier to access some of the more “remote” canyons. As I pulled into the main parking lot, it became clear to me that this is a popular park – not only were there a ton of cars, but also 10 school buses. Keep in mind it was a Friday in May. I prepared myself for what I was about to encounter. Don’t get me wrong, I think it is great that the kids are getting out and “enjoying” nature, but not was I had prepared for. Oh well, we adapt.

Pictures: The Entrance | Trail Map

So how did the park get its name? It came from a Native American legend. In the 1760s, Chief Pontiac of the Ottawa tribe, was attending a tribal council meeting. At this council of the Illinois and the Pottawatomie, an Illinois-Peoria brave stabbed Chief Pontiac. Vengeance arose in Pontiac’s followers. A great battle started. The Illinois, fearing death, took refuge on the great rock. After many days, the remaining Illinois died of starvation giving this historic park its name – Starved Rock.

The trails in the park are well marked and easy to navigate – you’ll come across boardwalks, stairs, paved trails, and moderate elevation changes. The deeper you go into the park, the more natural the trails become and you may encounter mud and puddles as I did. My first stop and closest site to the parking lot, was the infamous Starved Rock, where you get some great views of the Illinois River.

Pictures: The Legend of Starved Rock | One of the boardwalk and stairs to Starved Rock

Pictures: Views from Starved Rock: Leopold Island No. 1 and The Dam

The path and boardwalk will take you parallel to the river where you will come upon Lover’s Leap Overlook and then the Eagle Cliff Overlook. Both of these overlooks offer similar views of the Illinois River and the Eagle Cliff Overlook gives you a closer look at The Dam.

Pictures: The Dam from Lover’s Leap | A closer view of the Dam | Looking East from Eagle Cliff

Now it off to the Canyons and Waterfalls. I started with Wildcat Canyon and Falls – one of the tallest falls in the park with an 80-foot drop. Unfortunately, it was full of school kids despite the trail map clearly saying, “Swimming and Wading Prohibited,” hence why I took a “waist up” picture of the falls and didn’t include the pool below. Don’t get me wrong, I am all for enjoying nature, but in this case, the park is worried about the long-term damage to the eco-system.

And as you continue through the park, you’ll also come across some amazing rock formations.

Picture: Wildcat Canyon Falls
Picture: One of the many amazing rock formations.

Next up, one of my favorite canyons – LaSalle Canyon. The falls aren’t as high as Wildcat, standing 25′ high, but the canyon is beautiful and I love that you can walk behind the waterfalls. And typically there is water here year round. Tonty Canyon can also be accessed as you go hike up the trail to LaSalle Canyon, however it was closed the day I visited the park.

Pictures: LaSalle Canyon and Falls

I continued down the trail as far as the Hennepin Canyon Overlook where I was able to get a great view of the overlook from below it, by the river.

Picture: Hennepin Canyon Overlook

Hennepin was as far as I could hike due to a trail closure, so I double backed to Lone Tree Canyon, then took the stairs up to the canyon rim. It’s cool to walk along the canyon rims as you get a different perspective of the canyons and waterfalls.

Pictures: The hike up Lone Tree Canyon and Lone Tree Canyon

Pictures: Views of the Canyons and Waterfalls from above.

Overall my hike was 6.6 miles and took 2 hrs. 5 min. with stops. I took a break back at the parking lot, refueled with a couple of energy bars and fortified water, then head down river to the canyons I wasn’t able to reach due to the trail closure.

I parked at the lot between Illinois and Ottawa Canyons. This too was definitely an interesting hike – to start – I ran into a local, walking barefoot and for some reason had to tell me he was headed back home as he thought he left the oven on. Ok? Then a group of guys started hiking in front of me with a boom box (as I mentioned earlier “city folk”), so I went down a different trail. And at one of the waterfalls, I took a picture of a group of older ladies from Wisconsin. They traveled a bit and gave me a wealth of information and some great recommendations for hiking in Wisconsin, the U.P. (Michigan’s Upper Peninsula) and Minnesota.

On this hike, I headed towards Ottawa and Kaskaskia Canyons, where you will first pass under the Council Overhang – an uber cool rock formation!

Pictures: Council Overhang

I decided to go up to Kaskaskia Canyon first. This waterfall is pretty short with a 15-foot drop, but it was peaceful (the boom box guys took a different trail) and quite beautiful.

Picture: Kaskaskai Canyon Falls

Ottawa Canyon Falls was next. This is one of the taller falls at 45′.

Pictures: Ottawa Canyon Falls

Picture: Ottawa Canyon Falls

I headed back and this time there was no one at the Council Overhang. So I got more pictures and took a goofy picture – making it look like I was hanging from the overhang. (well sorta). Despite the crowds, I enjoyed my visit to Starved Rock State Park.

Picture: Council Overhang

Pictures: Council Overhang | Me “Hanging” from the Overhang

Date of Visit: 19 May 2023

Bash Bish Falls State Park | Massachusetts

I have to be honest, after visiting Bash Bish Falls, I was somewhat disappointed. I guess up to this point I had been spoiled with some epic hikes and big parks with numerous activities, view points and sites. So fast forward – I have now visited 20 of the state parks on The Discoverer’s list of the Best State Park in Each State (yes I am behind in writing as Bash Bish is #8), and I’ve realized that there is something unique about each park. Not all parks have a ton of different activities, view points, and sites, nor are they all big. But if you seek out what makes the park unique and perhaps combine it with other parks/sites in the area, it will be worth the visit. This is especially relevant as I write about Bash Bish Falls State Park.

So, I had just finished a great hike at Mt. Frissell – the highest point in Connecticut and I was excited to visit Bash Bish Falls State Park. The park is 424 acres and the main attraction is Bash Bish Falls – the highest single-drop waterfall in Massachusetts – with a dramatic final pitch that drops about 80 feet into an emerald plunge pool. It is adjacent to the 4,000-acre Mount Washington State Forest, as well as New York’s 5,000-acre Taconic State Park – two places to add to your visit.

Picture: Park Map

I had done a little research and learned that the Massachusetts parking area was under construction, so I parked on the New York side – not the end of the world – but adds to the story.

Parking: Where you park determines your hike to the falls.

  • From Massachusetts Parking Lot: (When it reopens) Difficult ability (I can’t attest to this), about 0.6 miles round-trip. It’s shorter, more rugged, and strenuous per the park website.
  • From New York Parking Lot: Moderate ability (it’s really easy in my opinion), about 1.5 miles round-trip. It’s longer and gradual, but rocky and uneven per the park website.

Pictures: Views along the hike up to Bash Bish Falls

As you can see in the above pictures – more and more parks are asking that you refrain from stacking rocks or making cairns and rightfully so. This practice is disruptive to the environment – not only does it cause harmful erosion, but many insects and mammals head under rocks to live, reproduce or escape their predators. Now don’t get me wrong, people have been stacking rocks since the dawn of time, typically for directional or burial purposes. And more recently, park officials began creating them on hiking trails – especially potentially confusing paths – to help ensure hikers don’t get lost. But we shouldn’t be creating them for the sake of an Instagram post. Our future relies on a healthy natural environment and we need to abide by the motto – Leave no Trace!

Picture: Entering into Massachusetts and Bash Bish Falls State Park

The falls are beautiful and I really enjoyed hiking the gorge. It certainly was a relaxing visit and especially welcoming after a long hike up to Mt. Frissell.

Picture: Bash Bish Falls
Picture: Bash Bish Falls and the emerald plunge pool

Pictures: The deep, verdant gorge | Bash Bish Falls and the gorge

Picture: Back to New York

If you’re in the area, it’s definitely worth the visit and there are a ton of things to do in both the Berkshires and the Taconic Mountain Range.

Date of Visit: 12 May 2023

Page 7 of 9

Powered by WordPress & Theme by Anders Norén